Making Clever Lizard
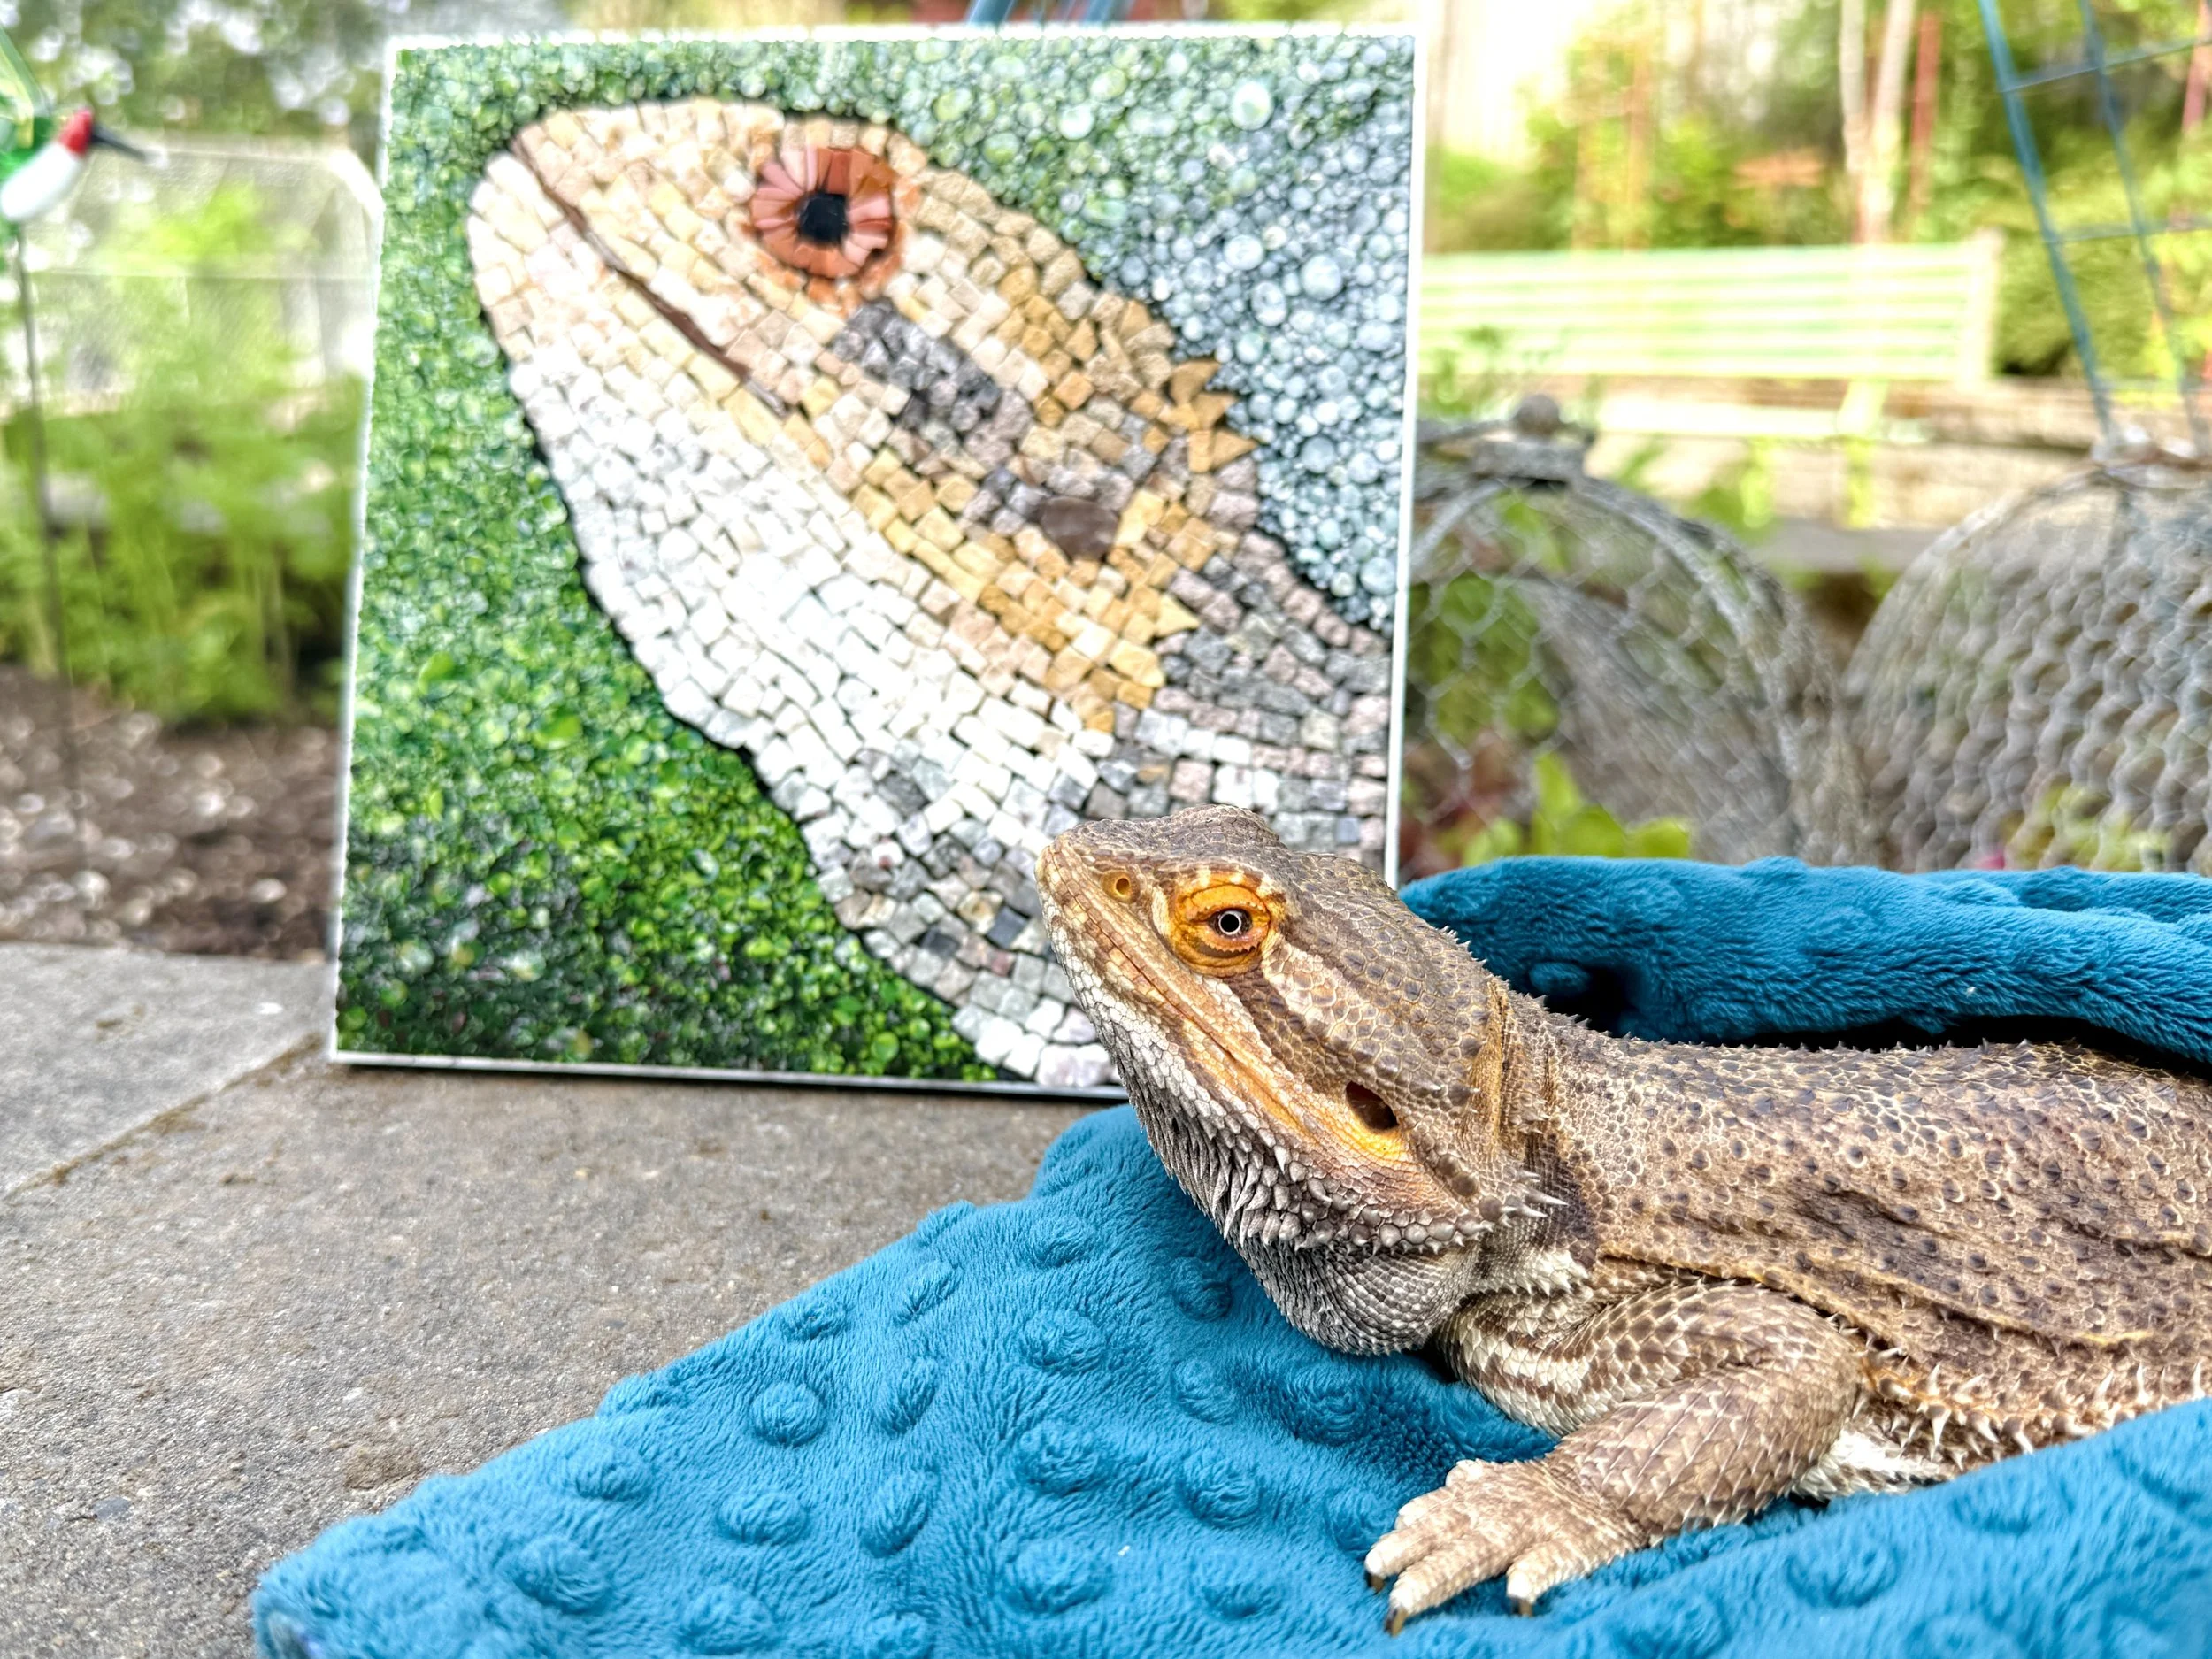
My bearded dragon Lewis is patient, stoic, and very clever. So I did what any devoted beardie parent would do - I made him a mosaic. It was a meaty project (a month of work with 40 hand-pulled threads), but in the end Lewis approved!

Behind the Scenes
Step 1: Making the stone lizard
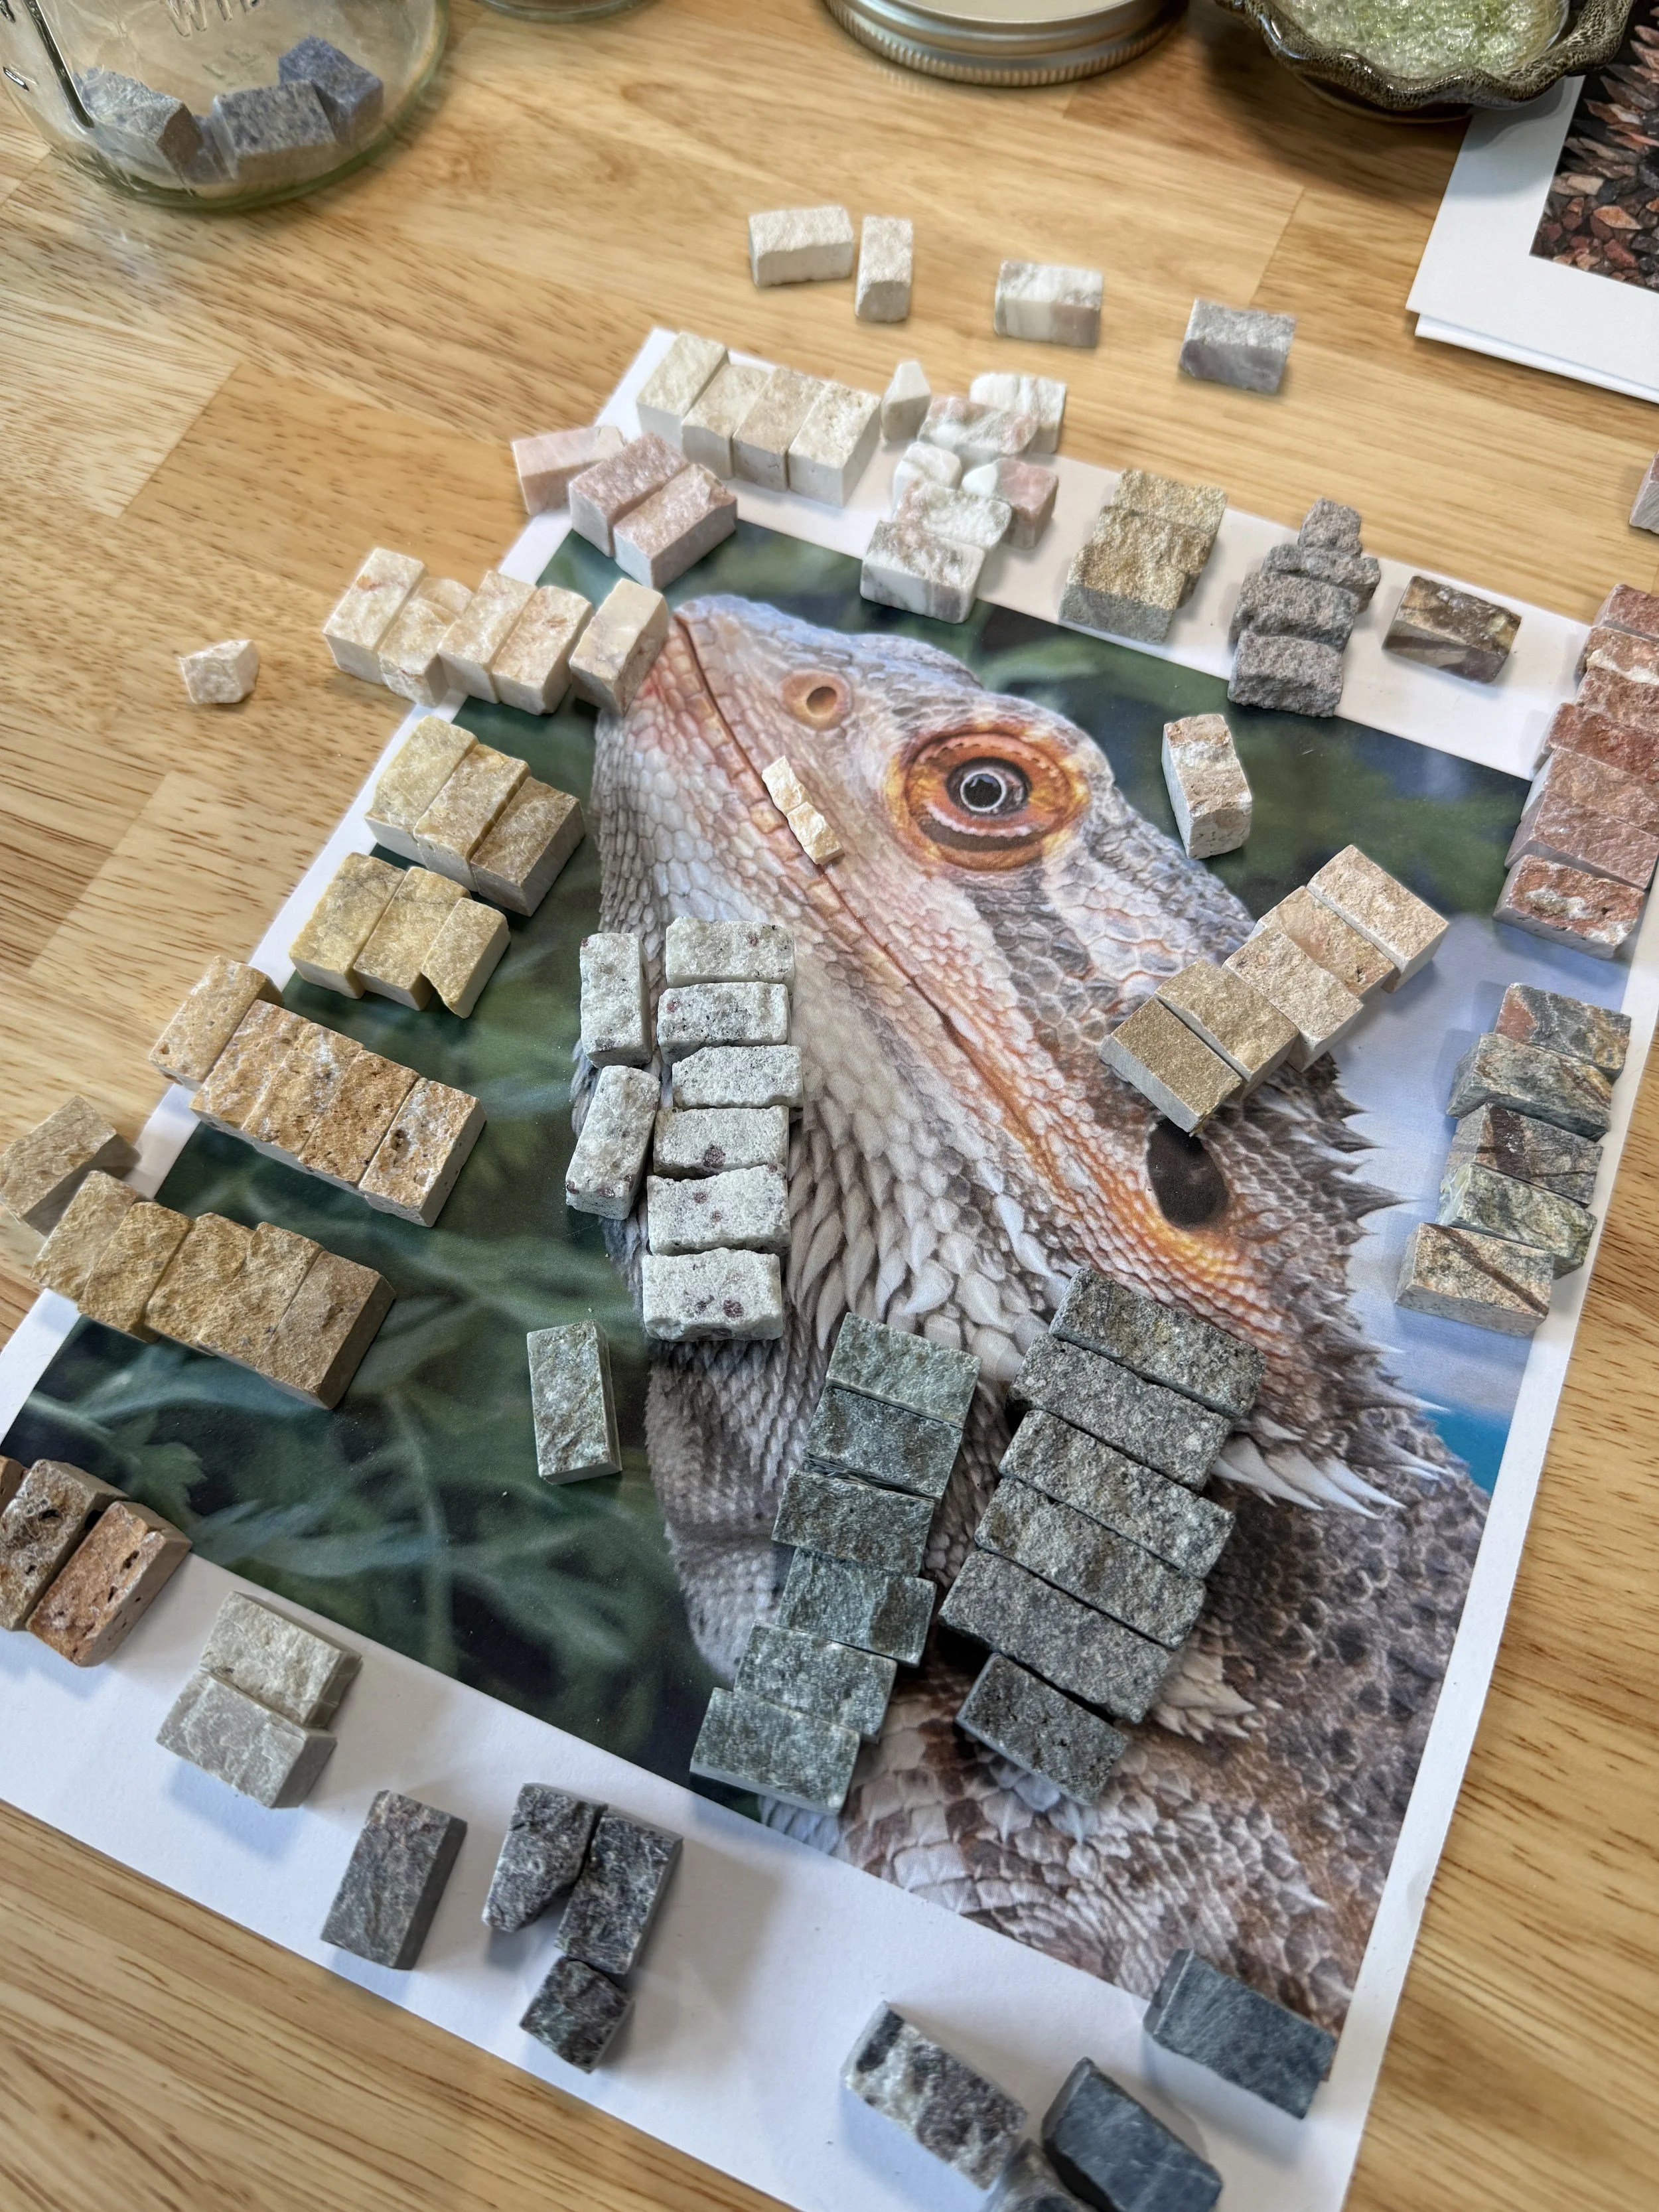
I printed an 8×8 image of Lewis in the garden, the same size as my frame. I laid out several colors of natural stone tiles to get a feel for the color palette.
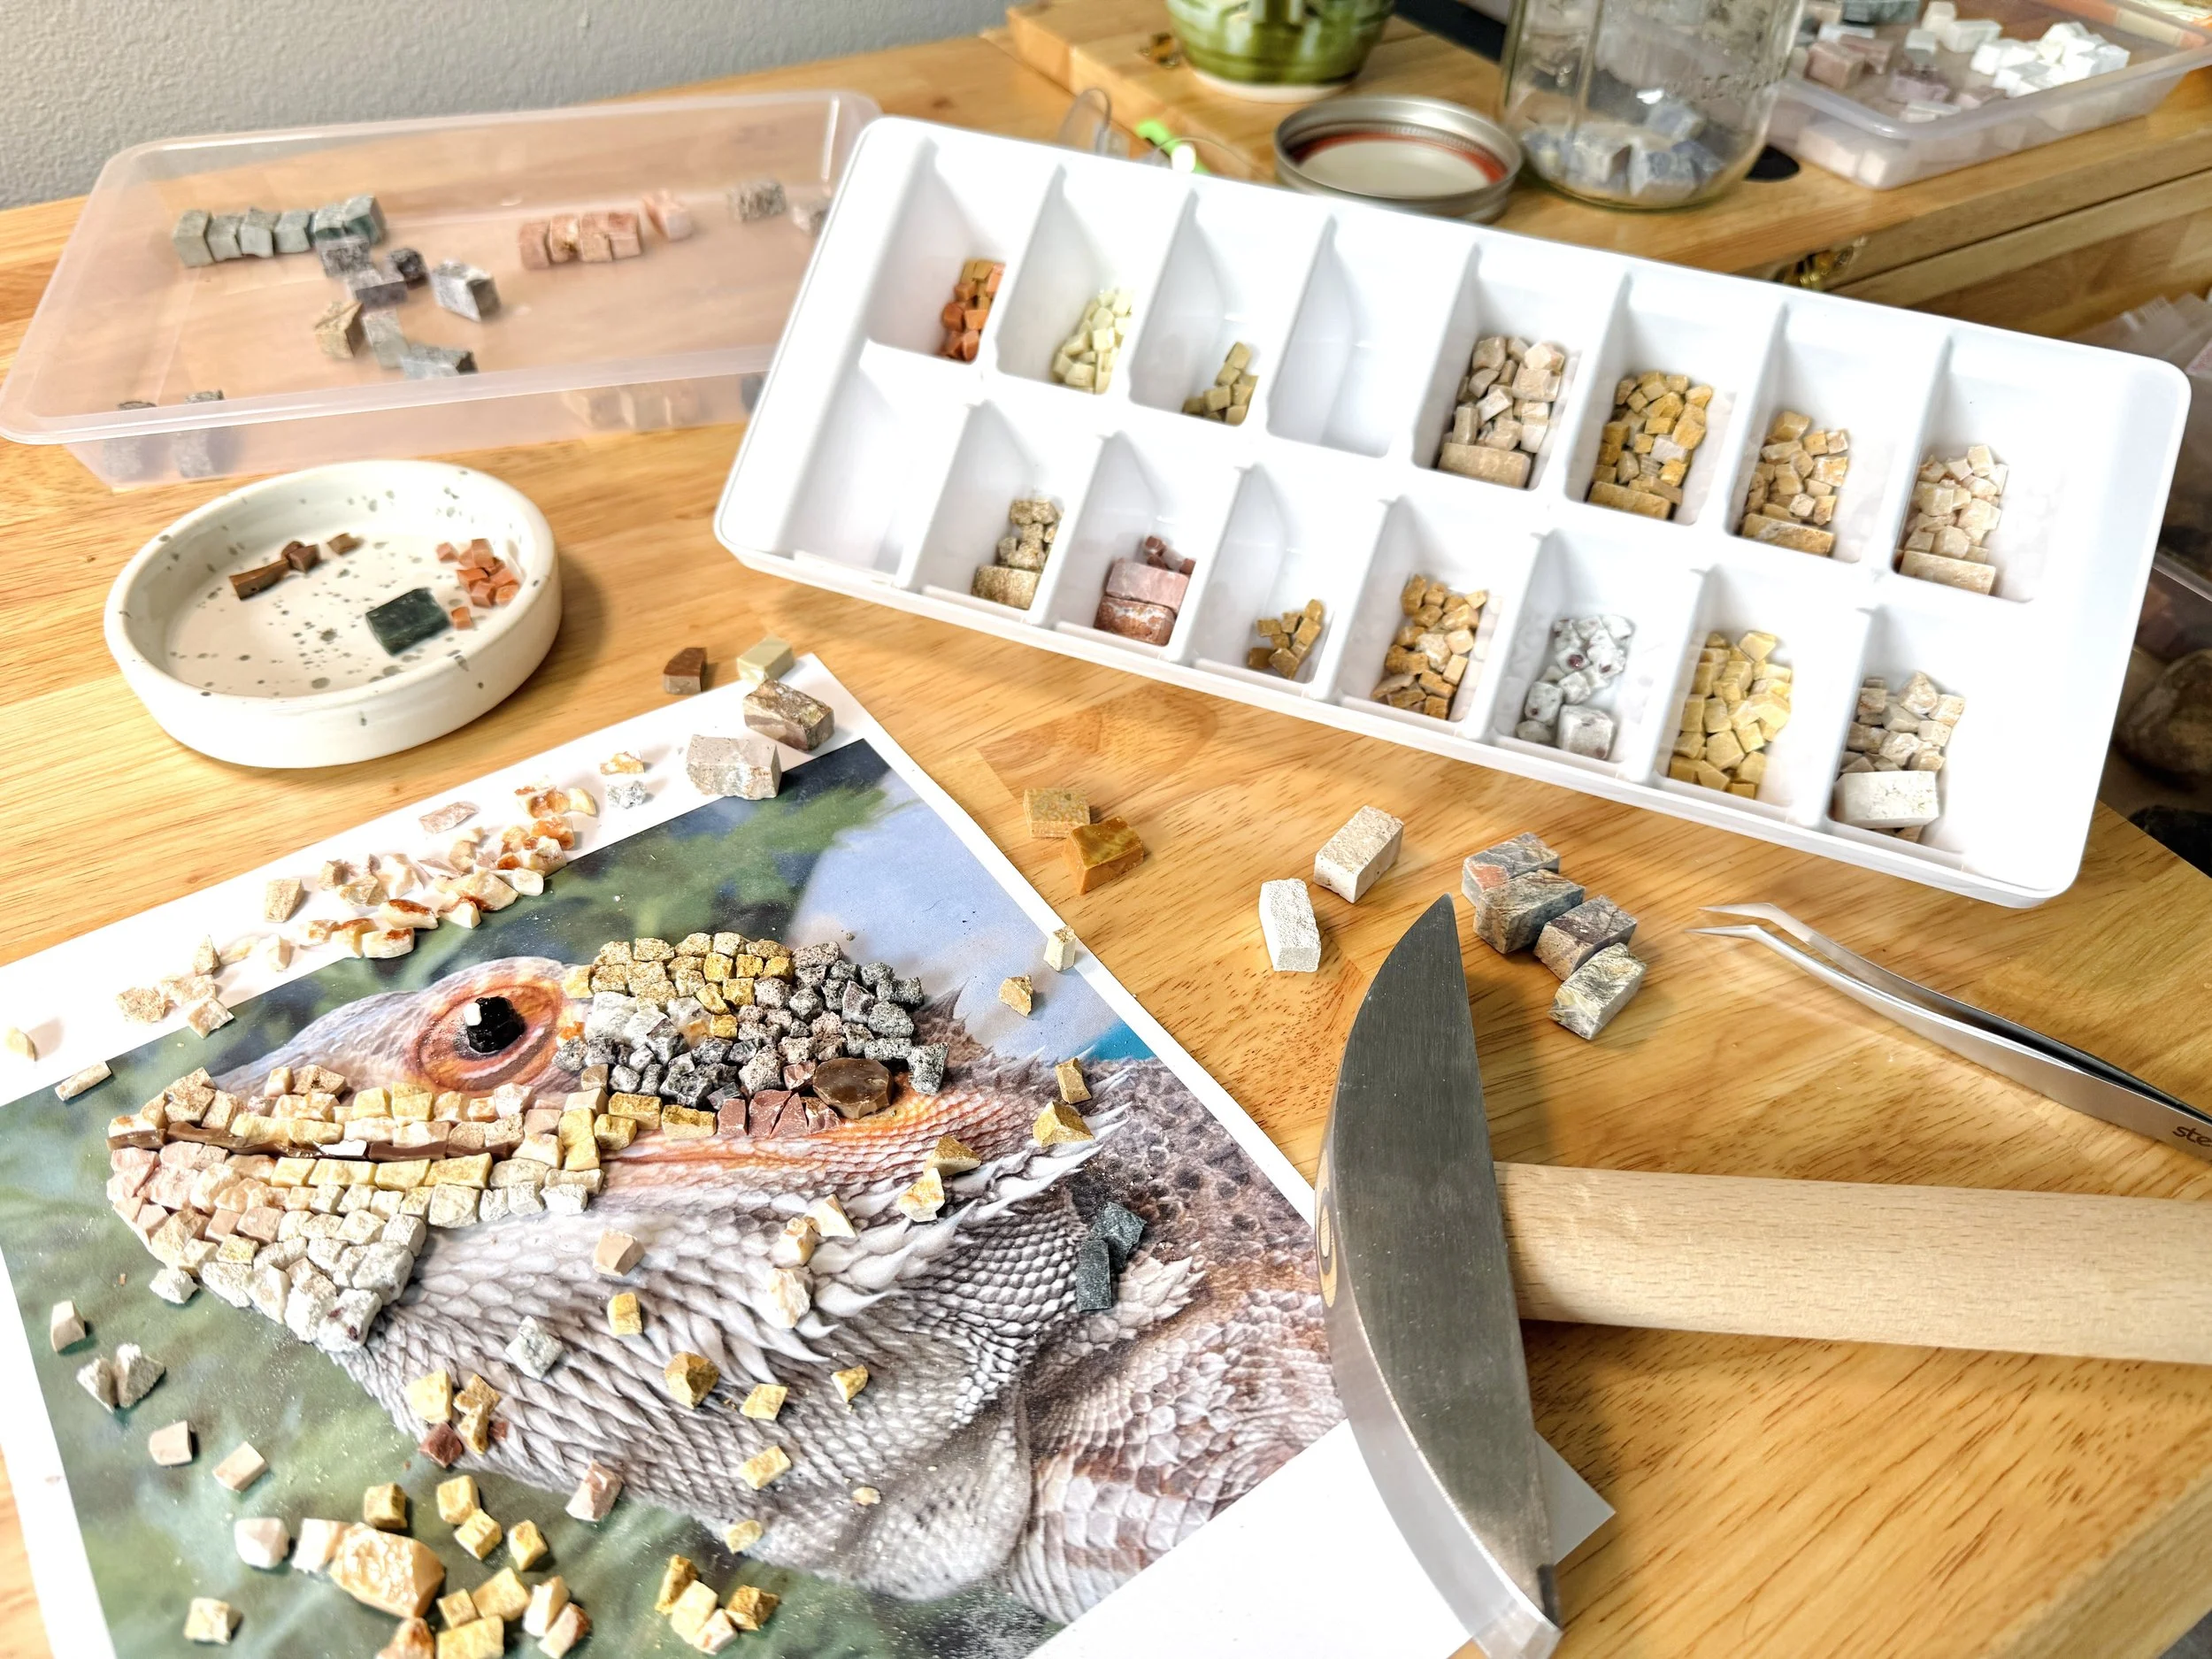
I used my hammer and hardie to break up the stone tiles into smaller tesserae, which I then ‘dry fit’ over the image. An ice cube tray was a great tool for sorting!
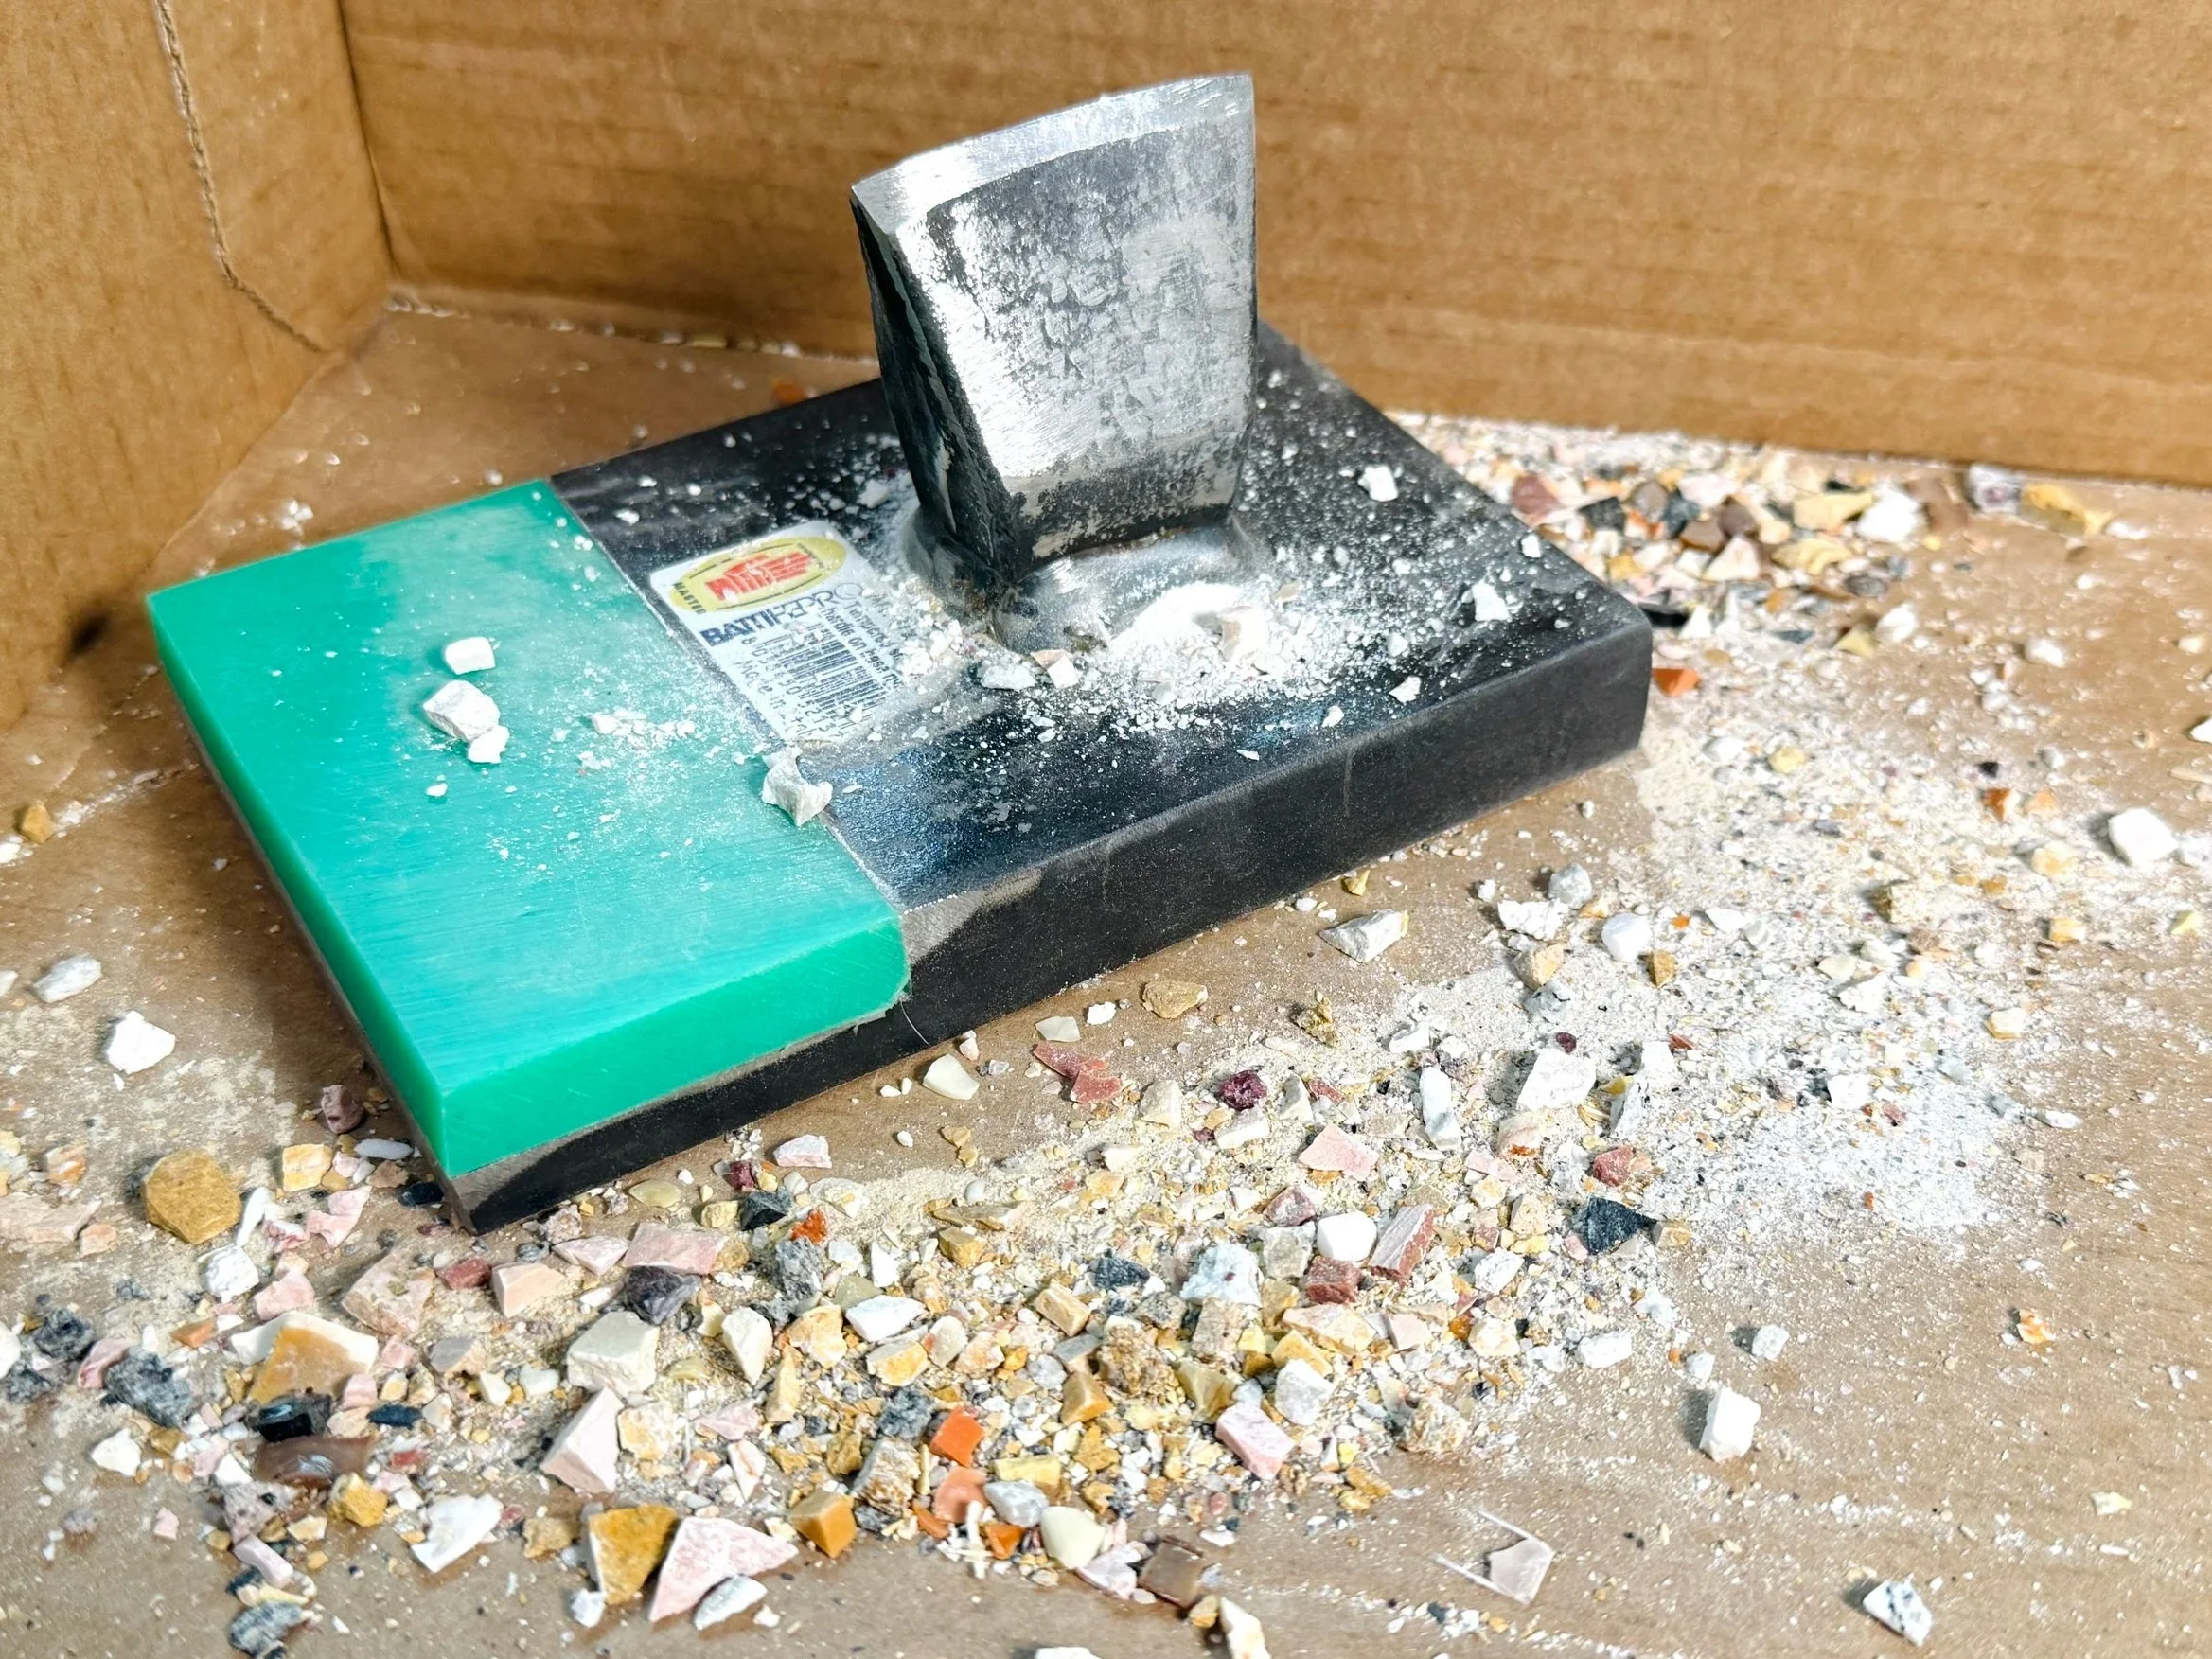
Mid-project: my hardie and rock dust
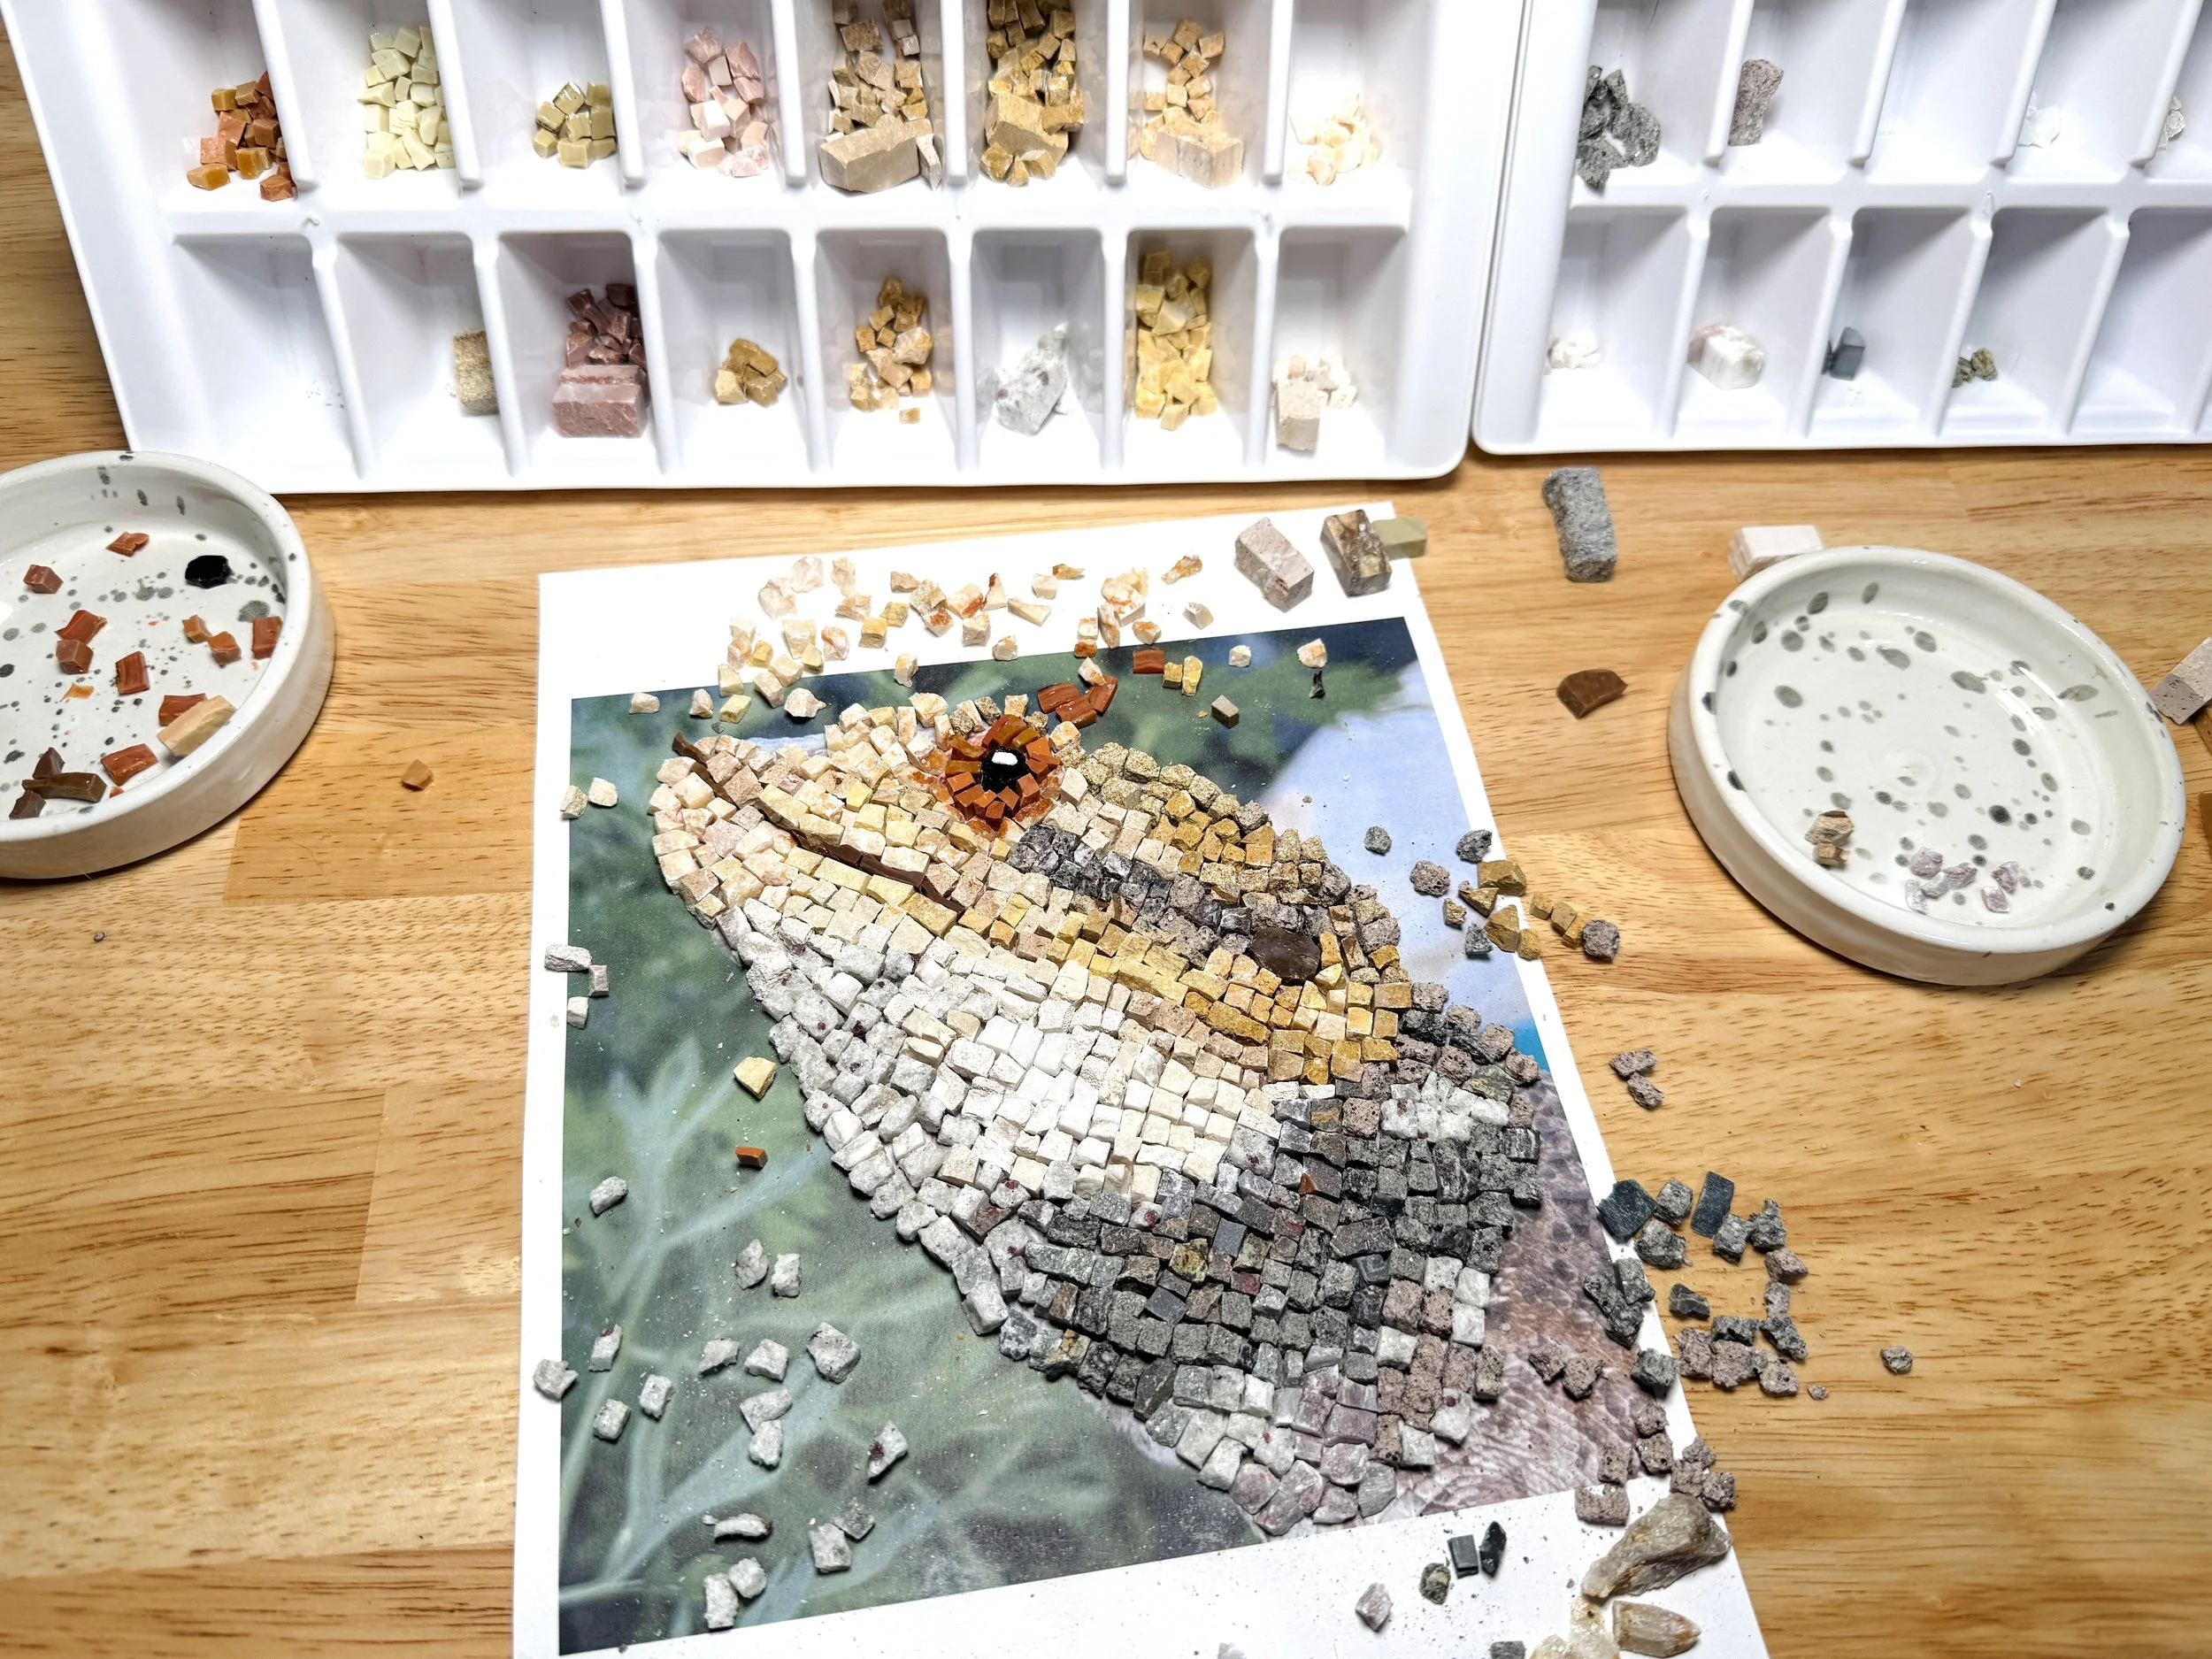
Nearly done with the dry fit.
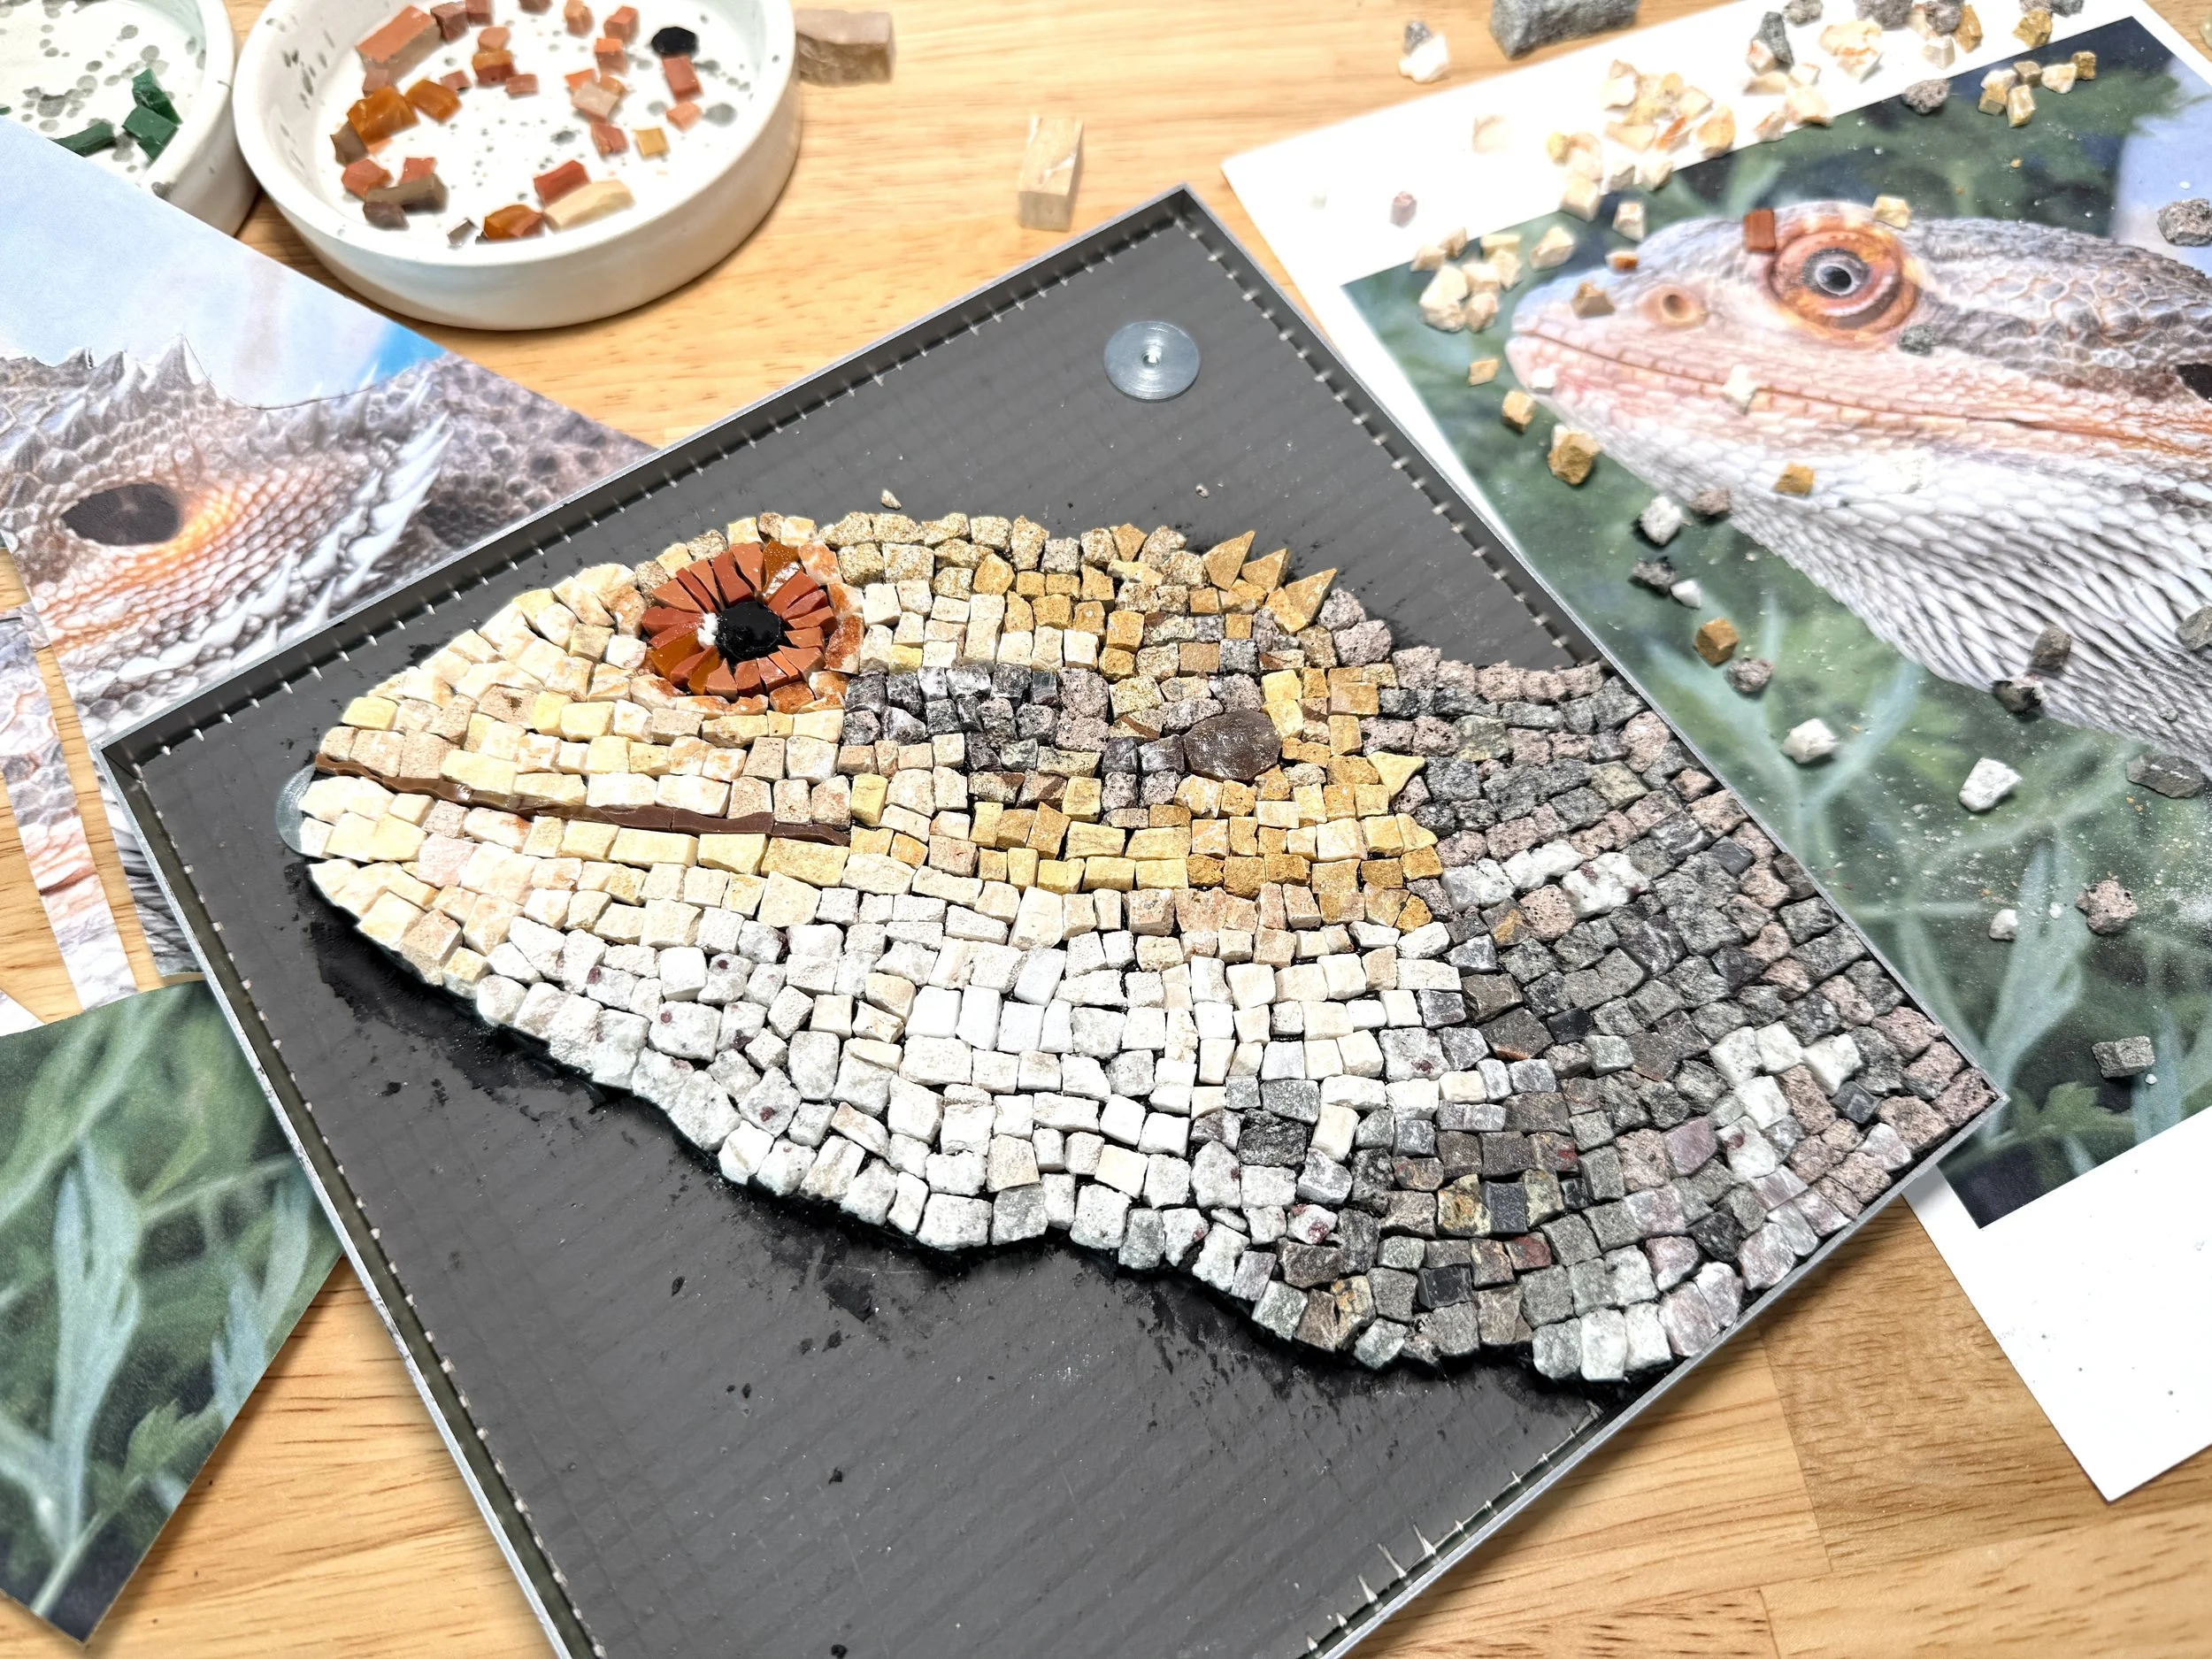
I carefully transferred and adhered each tesserae to the frame, doing my best to mind my andamento.
Step 2: Making the glass background
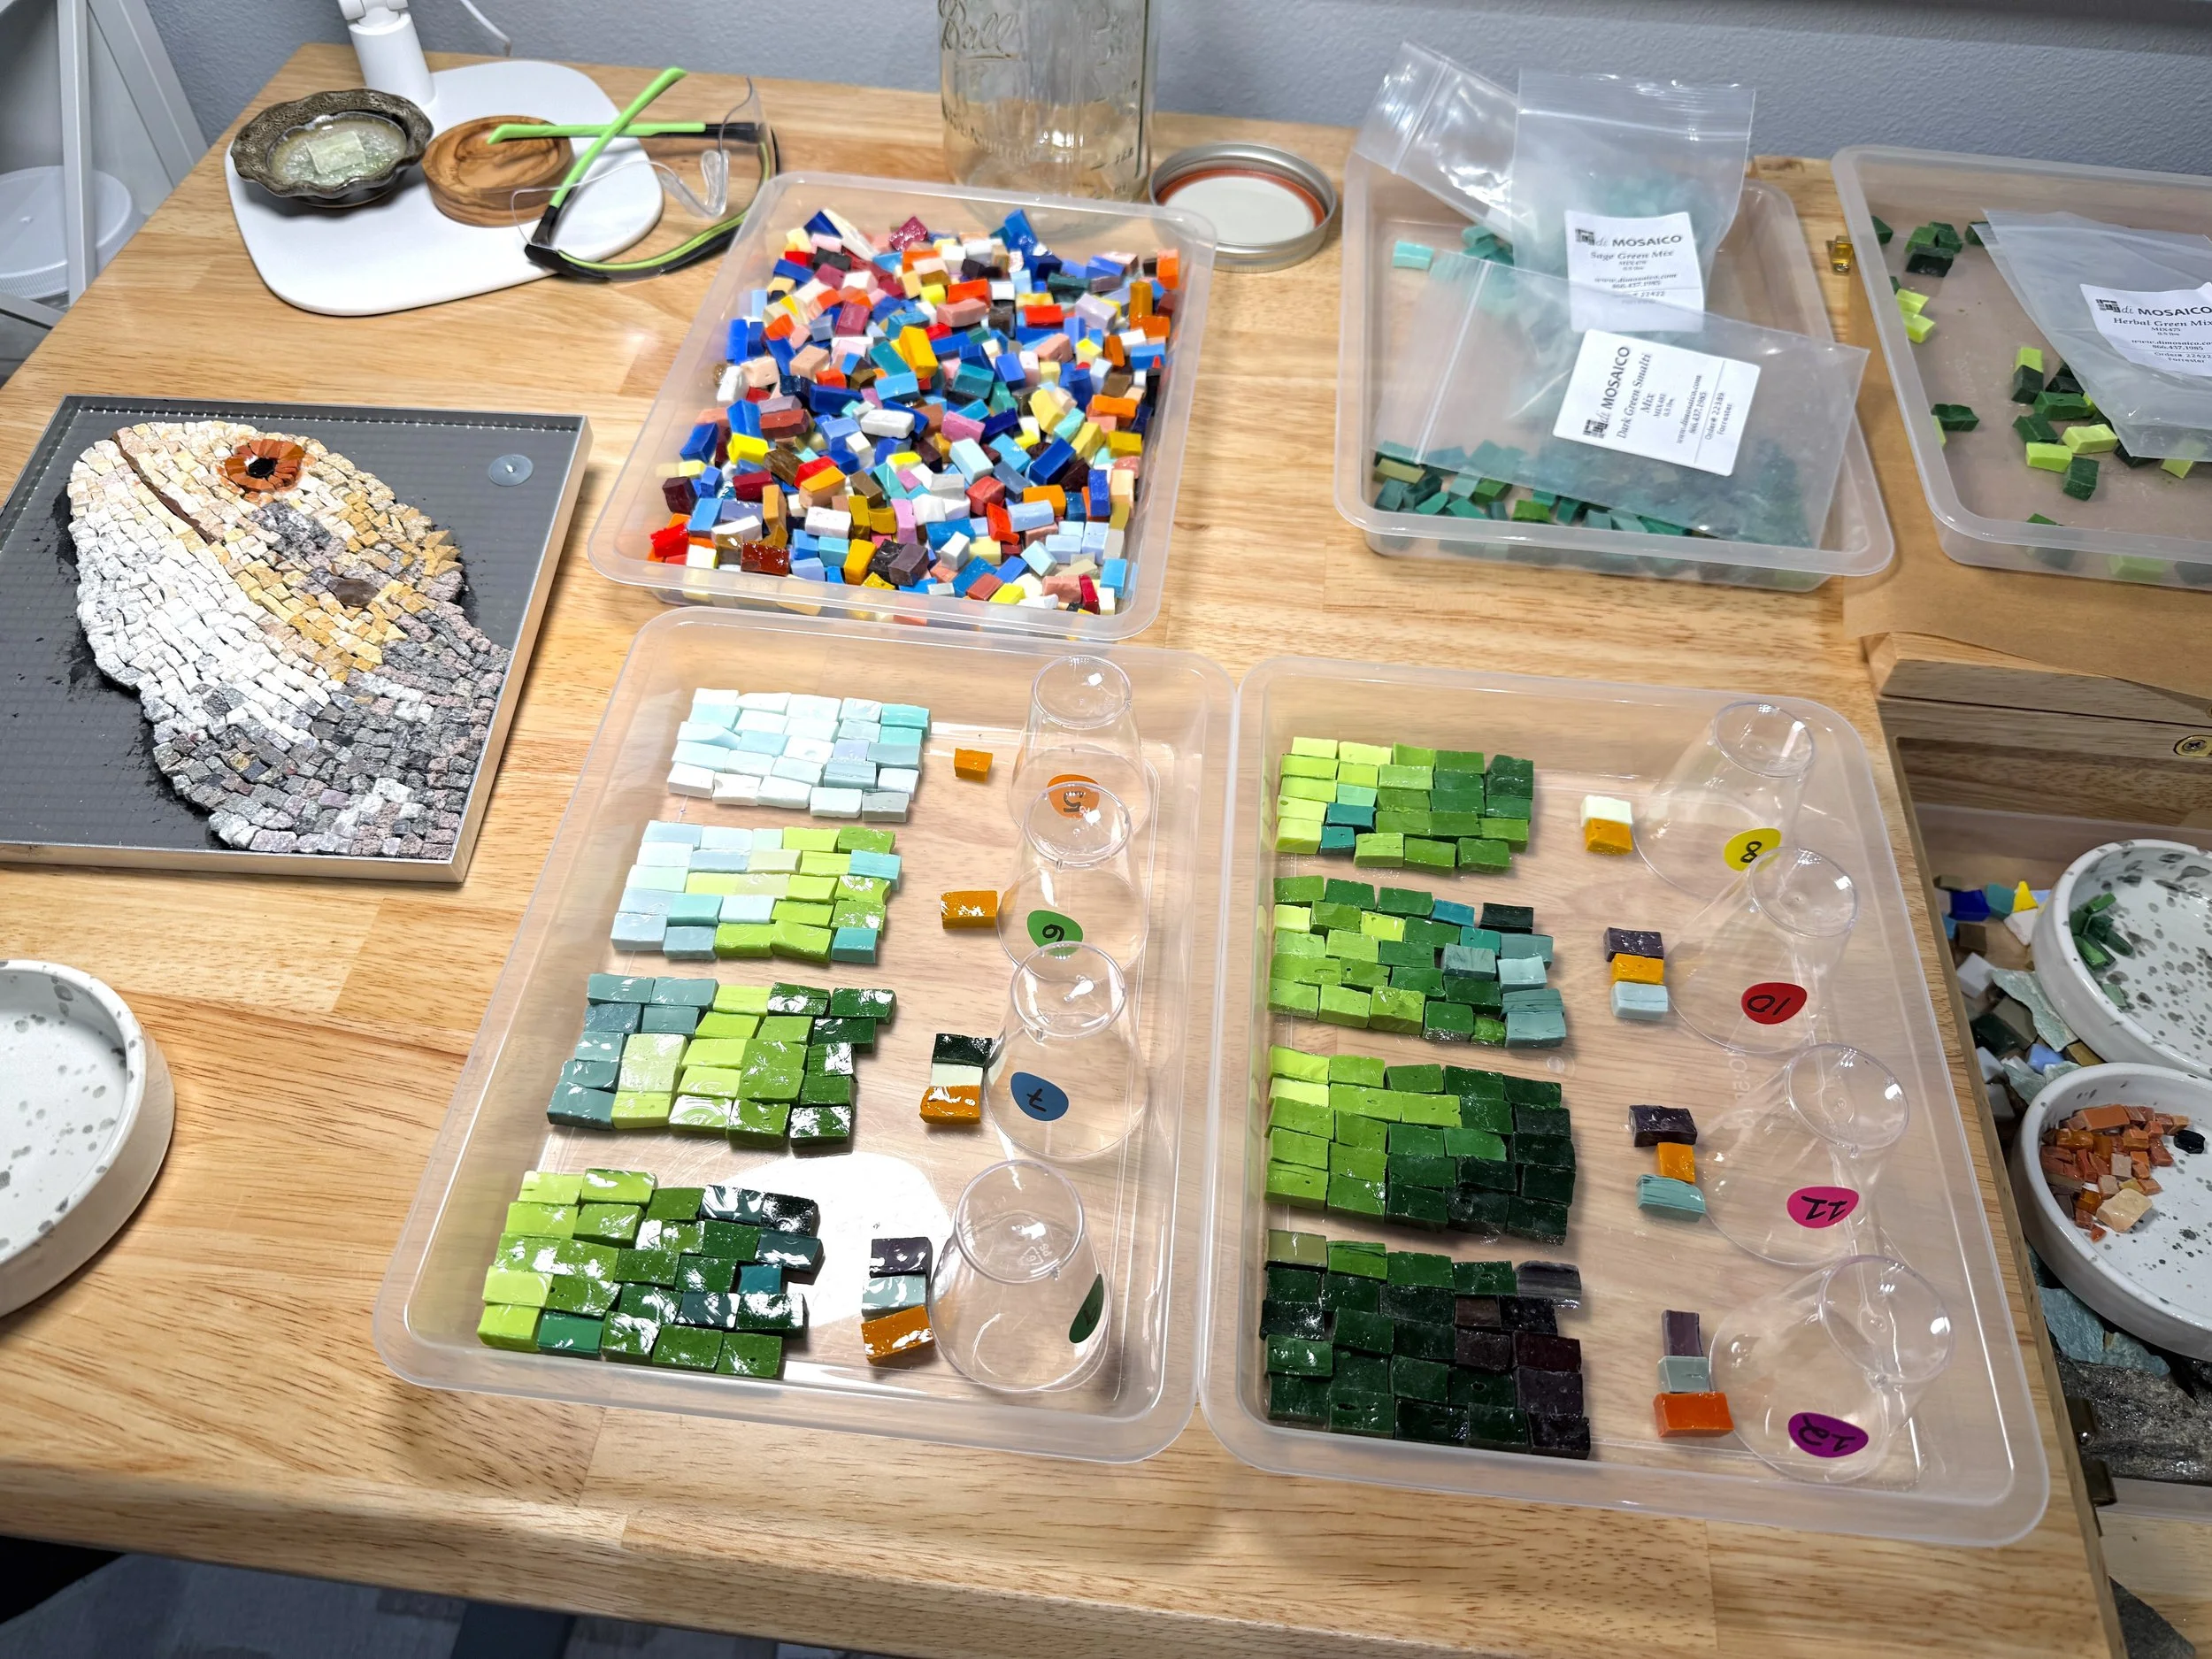
I laid out my color ‘formulas’ in 8 batches with 5 threads each (40 threads).
The formulas for batches 5-8.
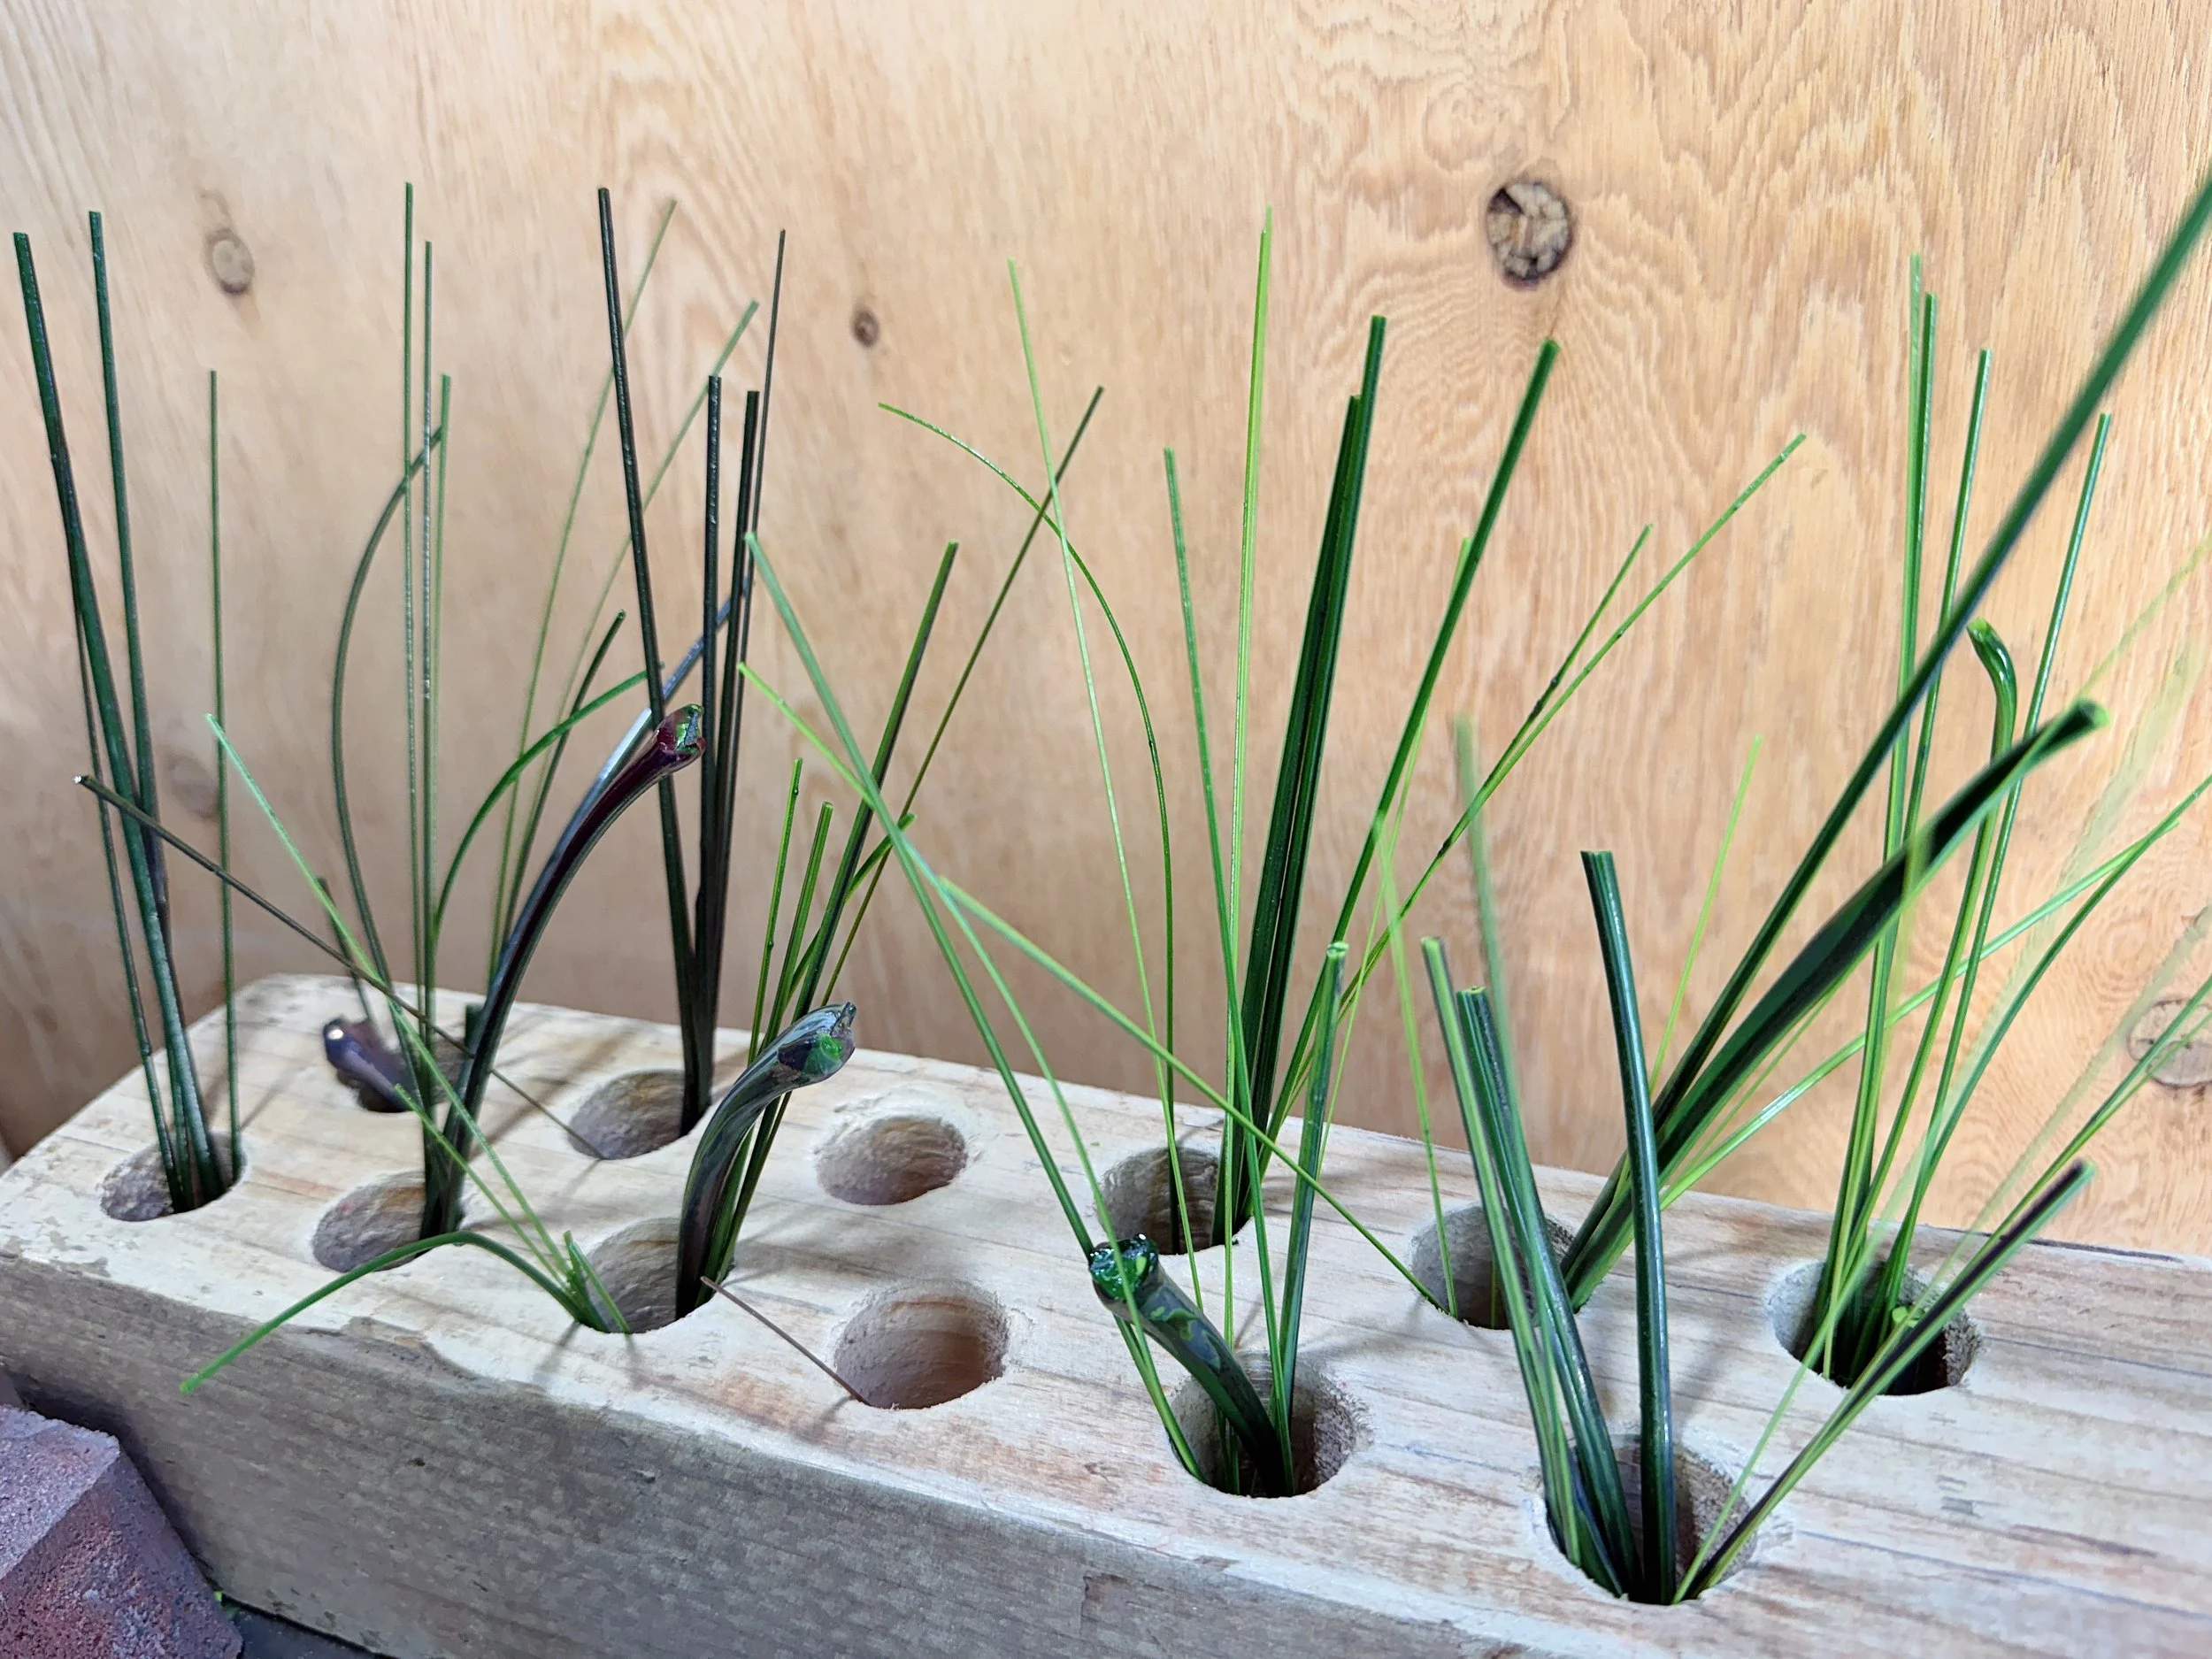
I then melted and pulled all 40 threads! (10 pictured)
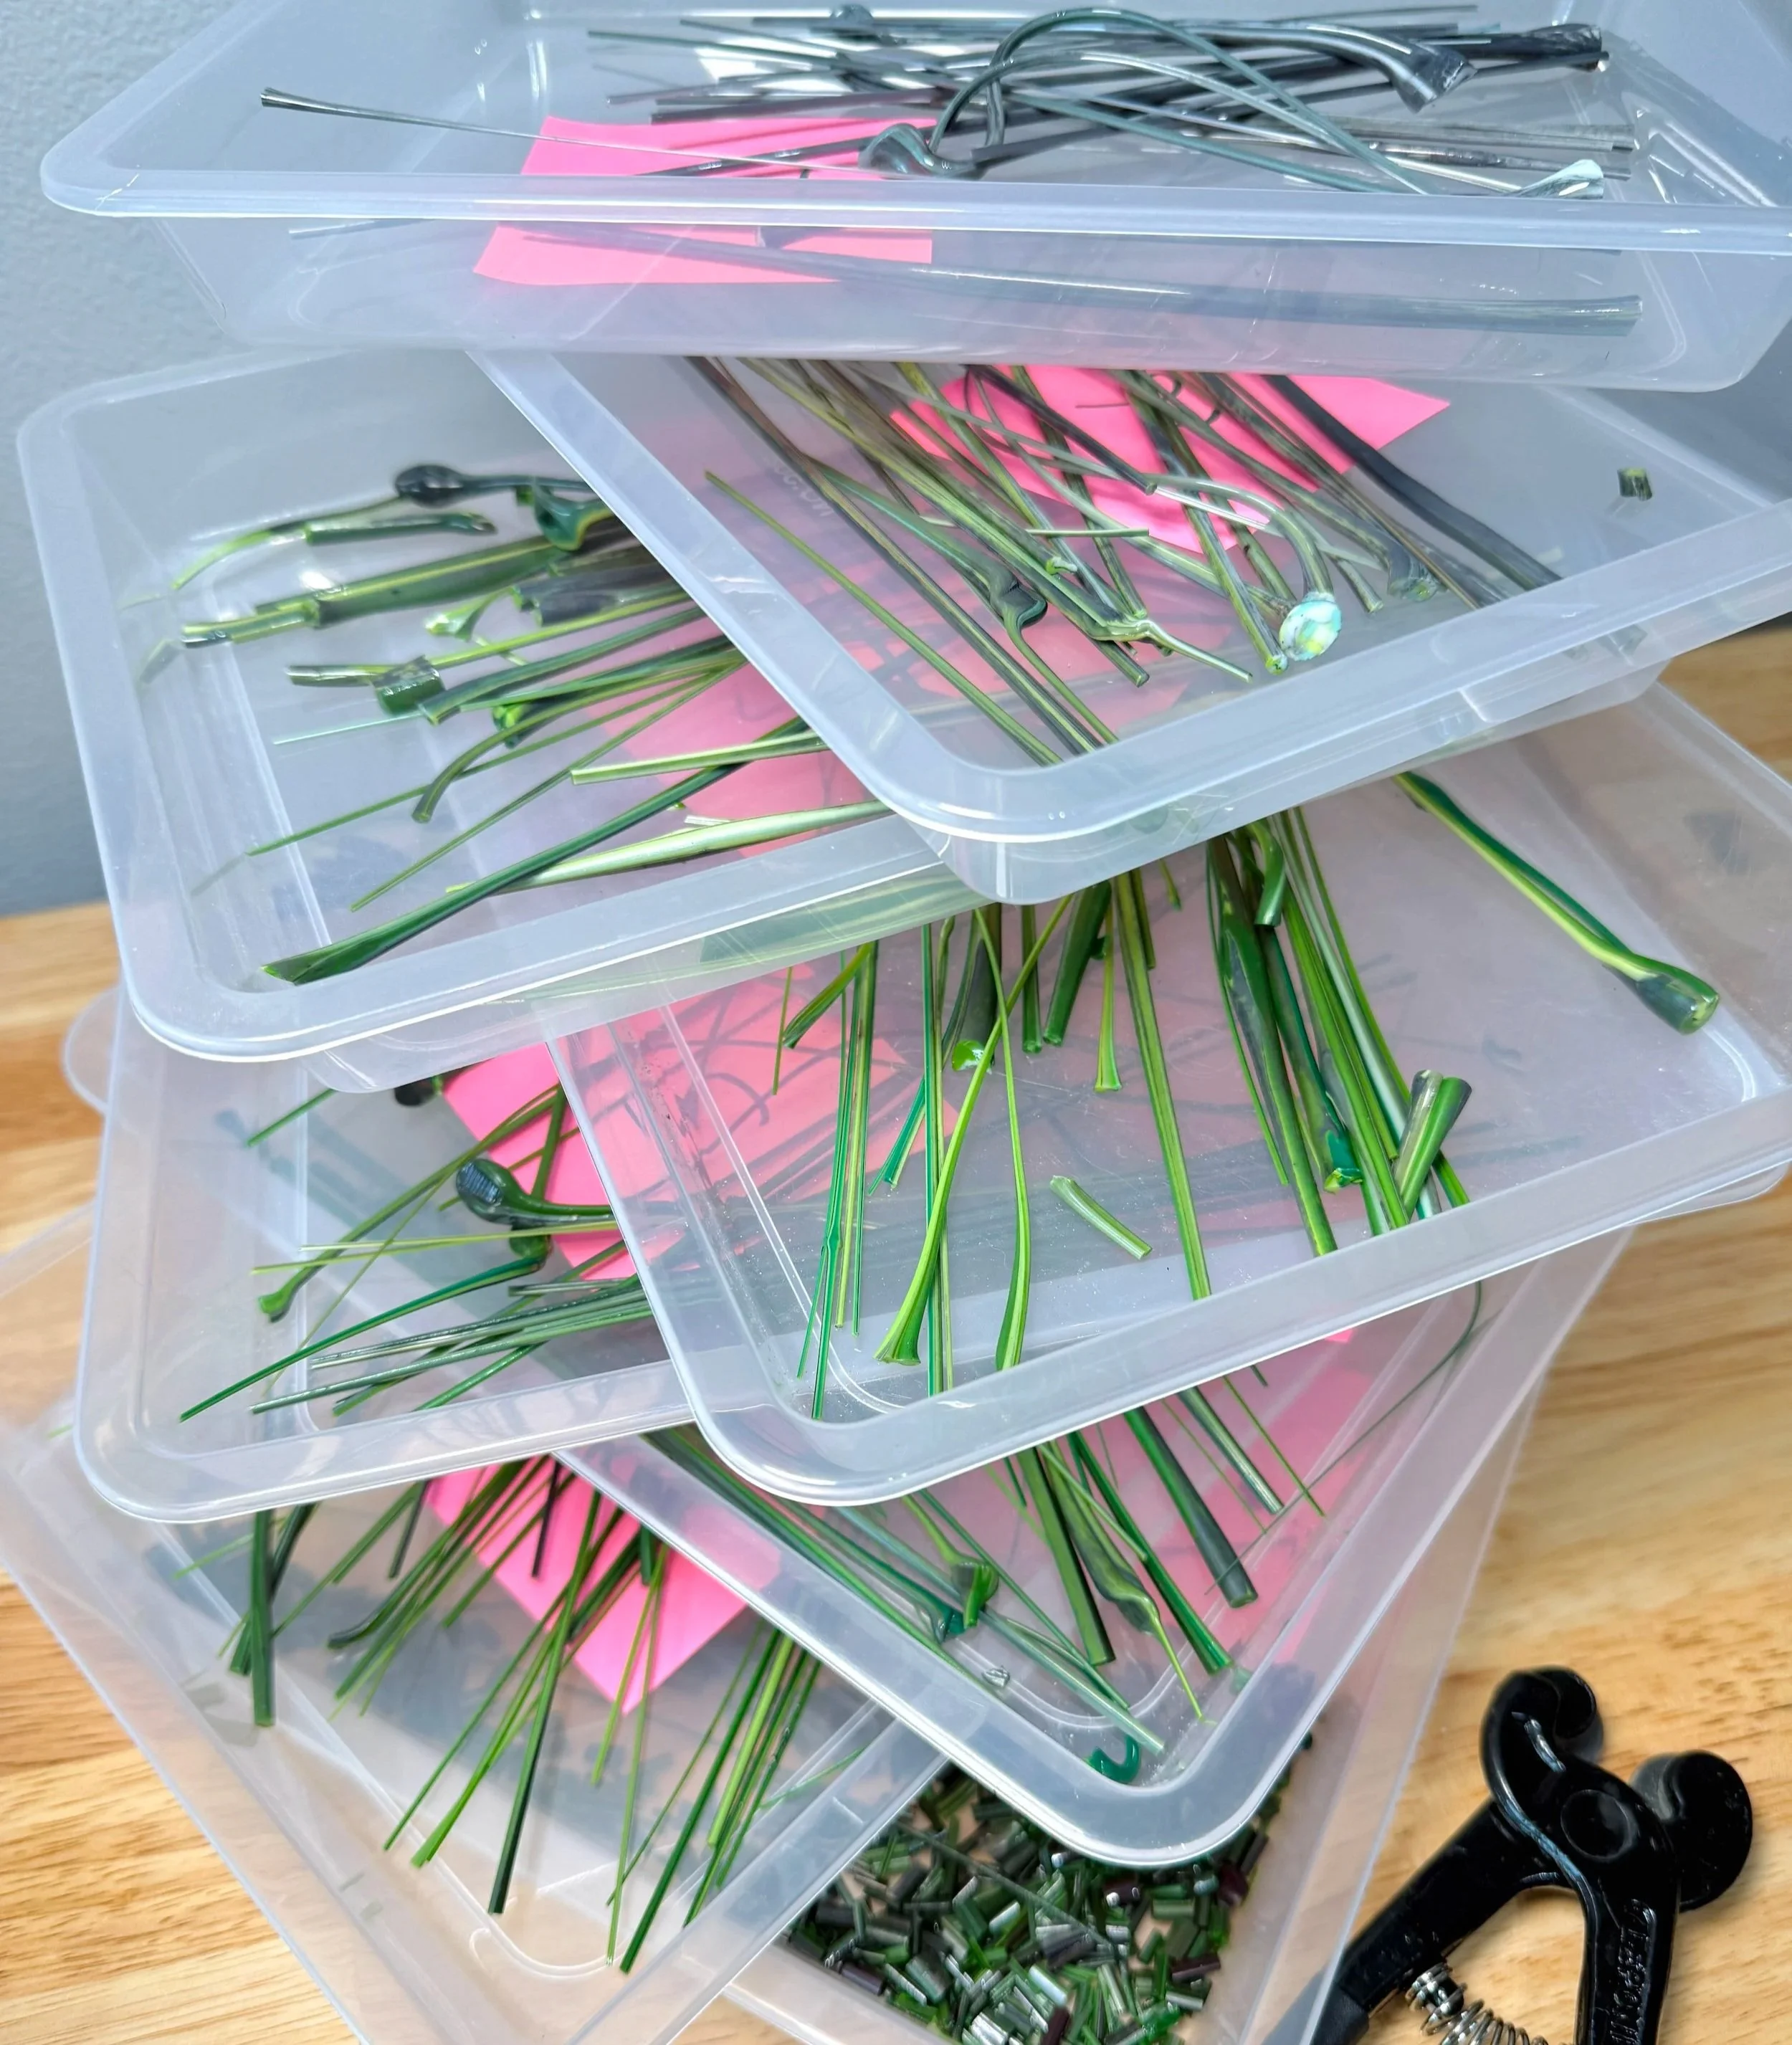
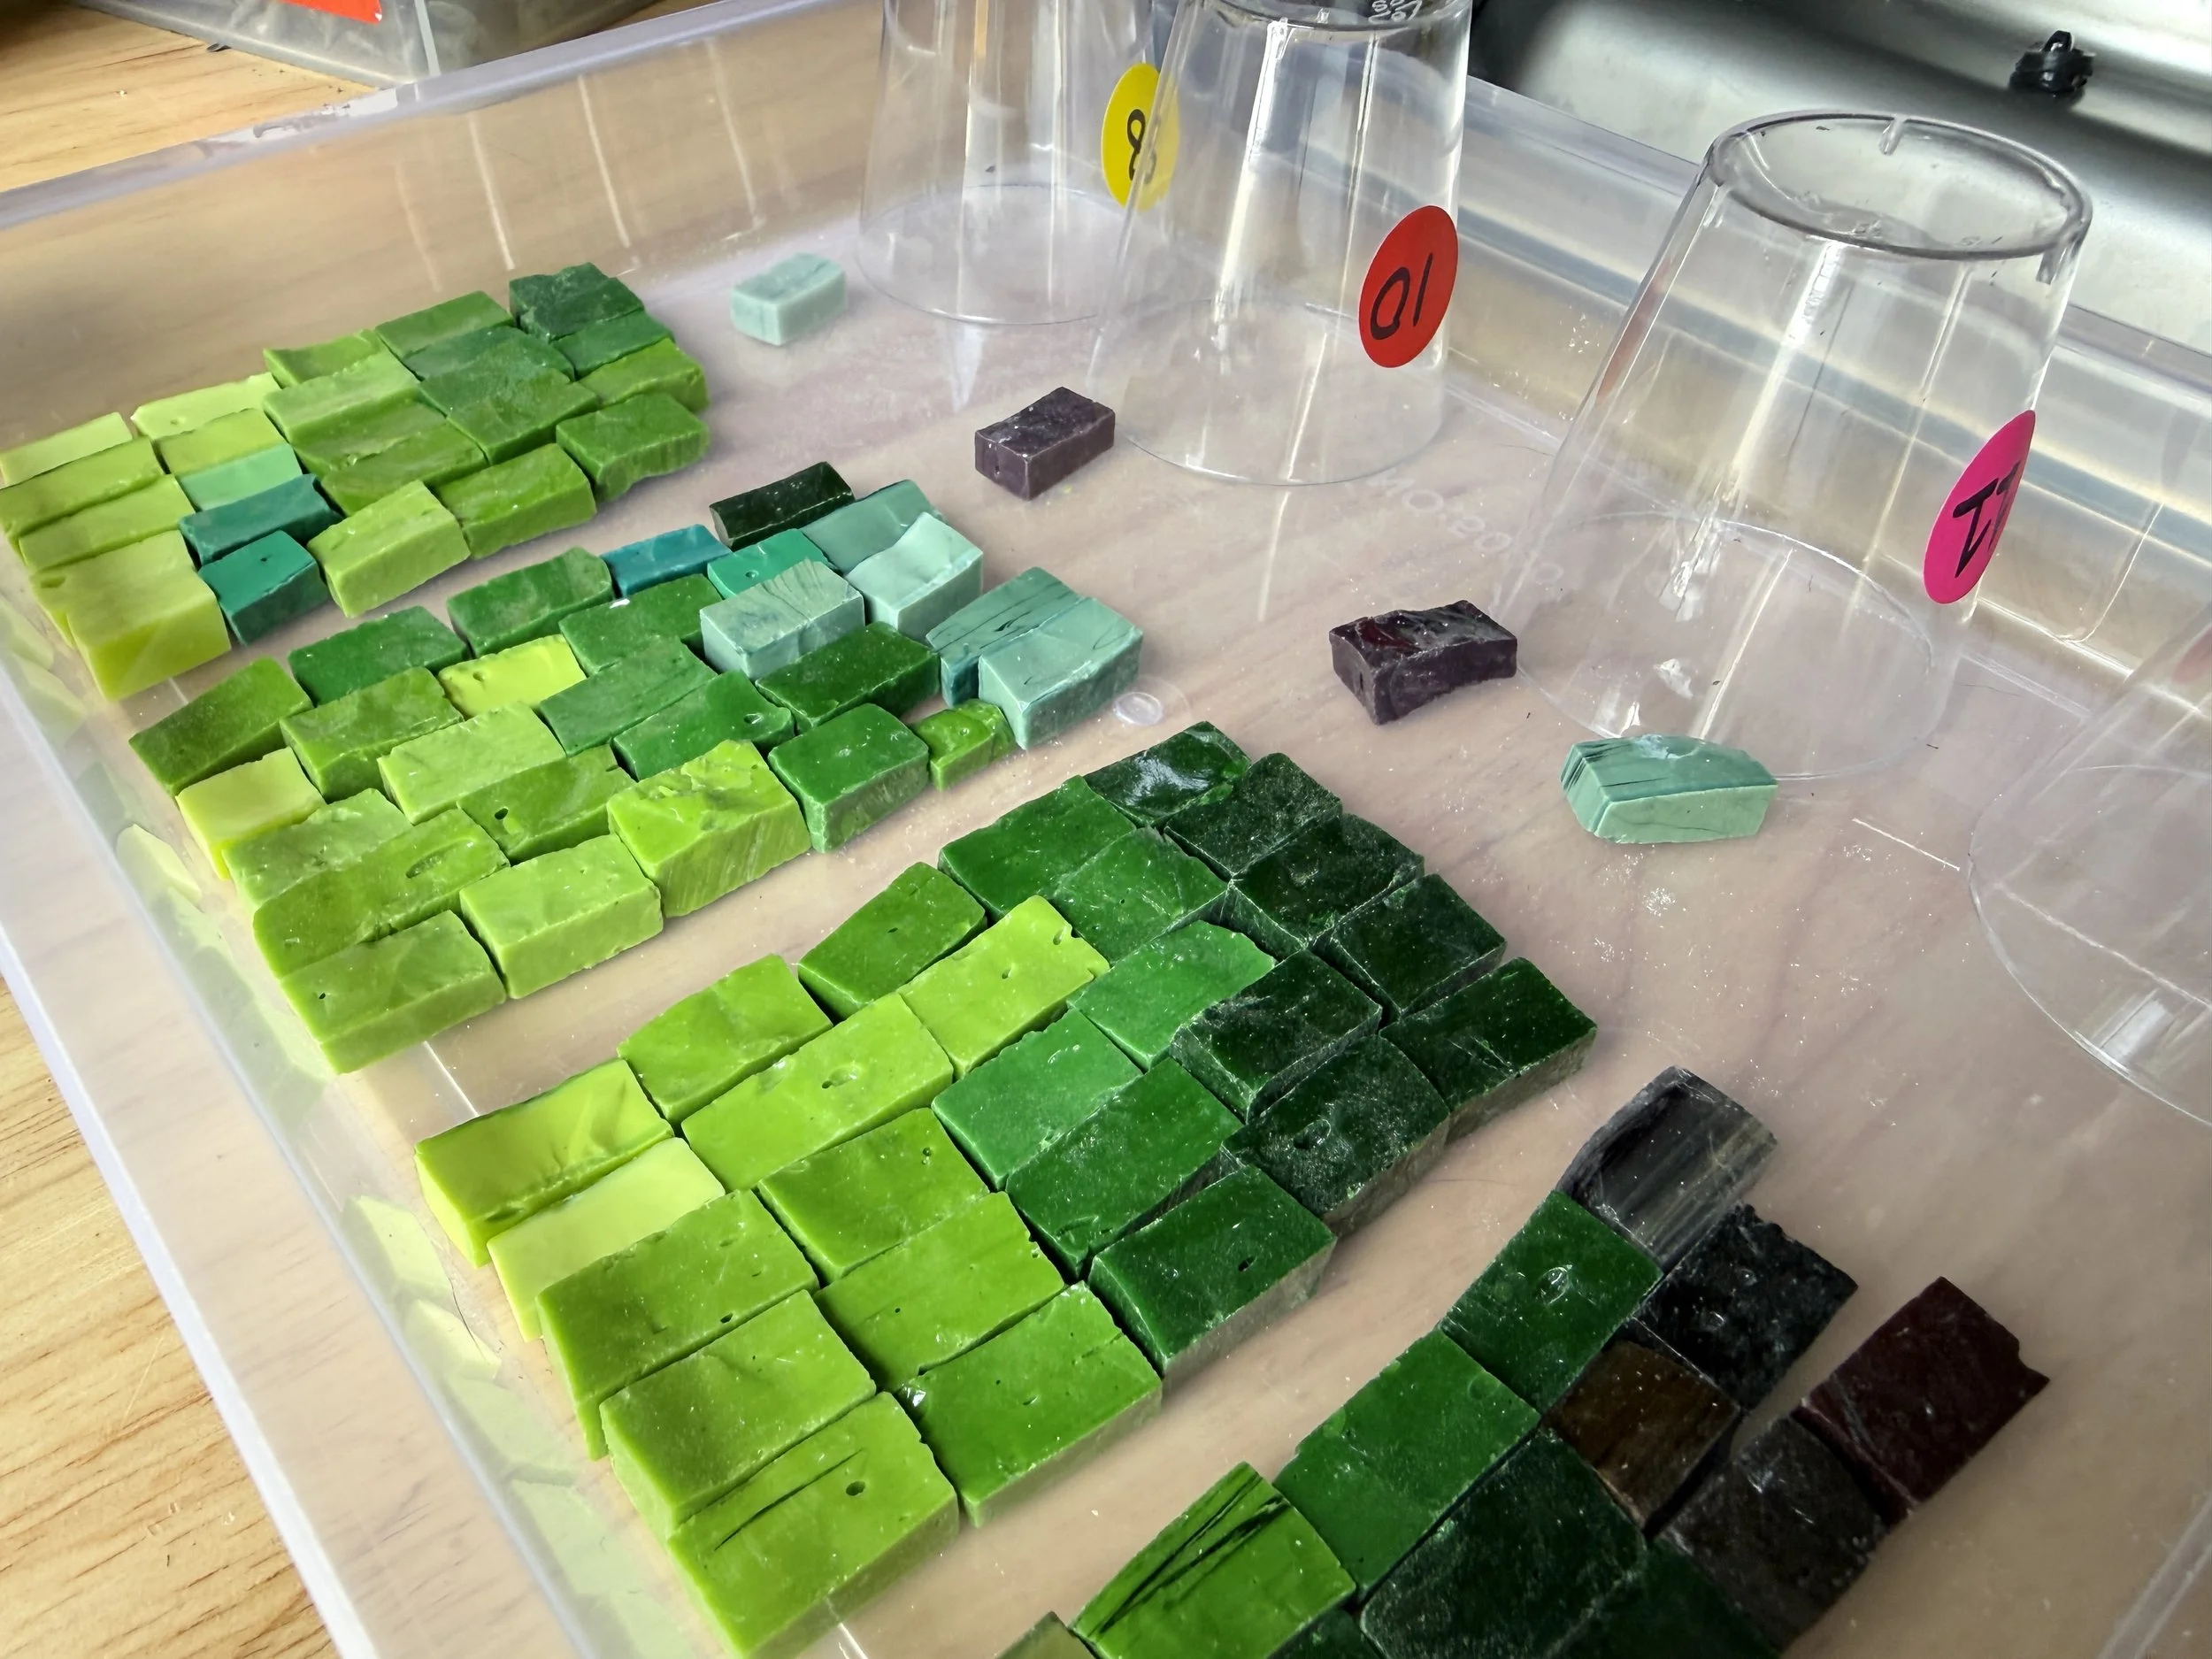
I sorted each batch in a tray, numbered 1-8.

I then cut each batch into tesserae - sooo many cuts!
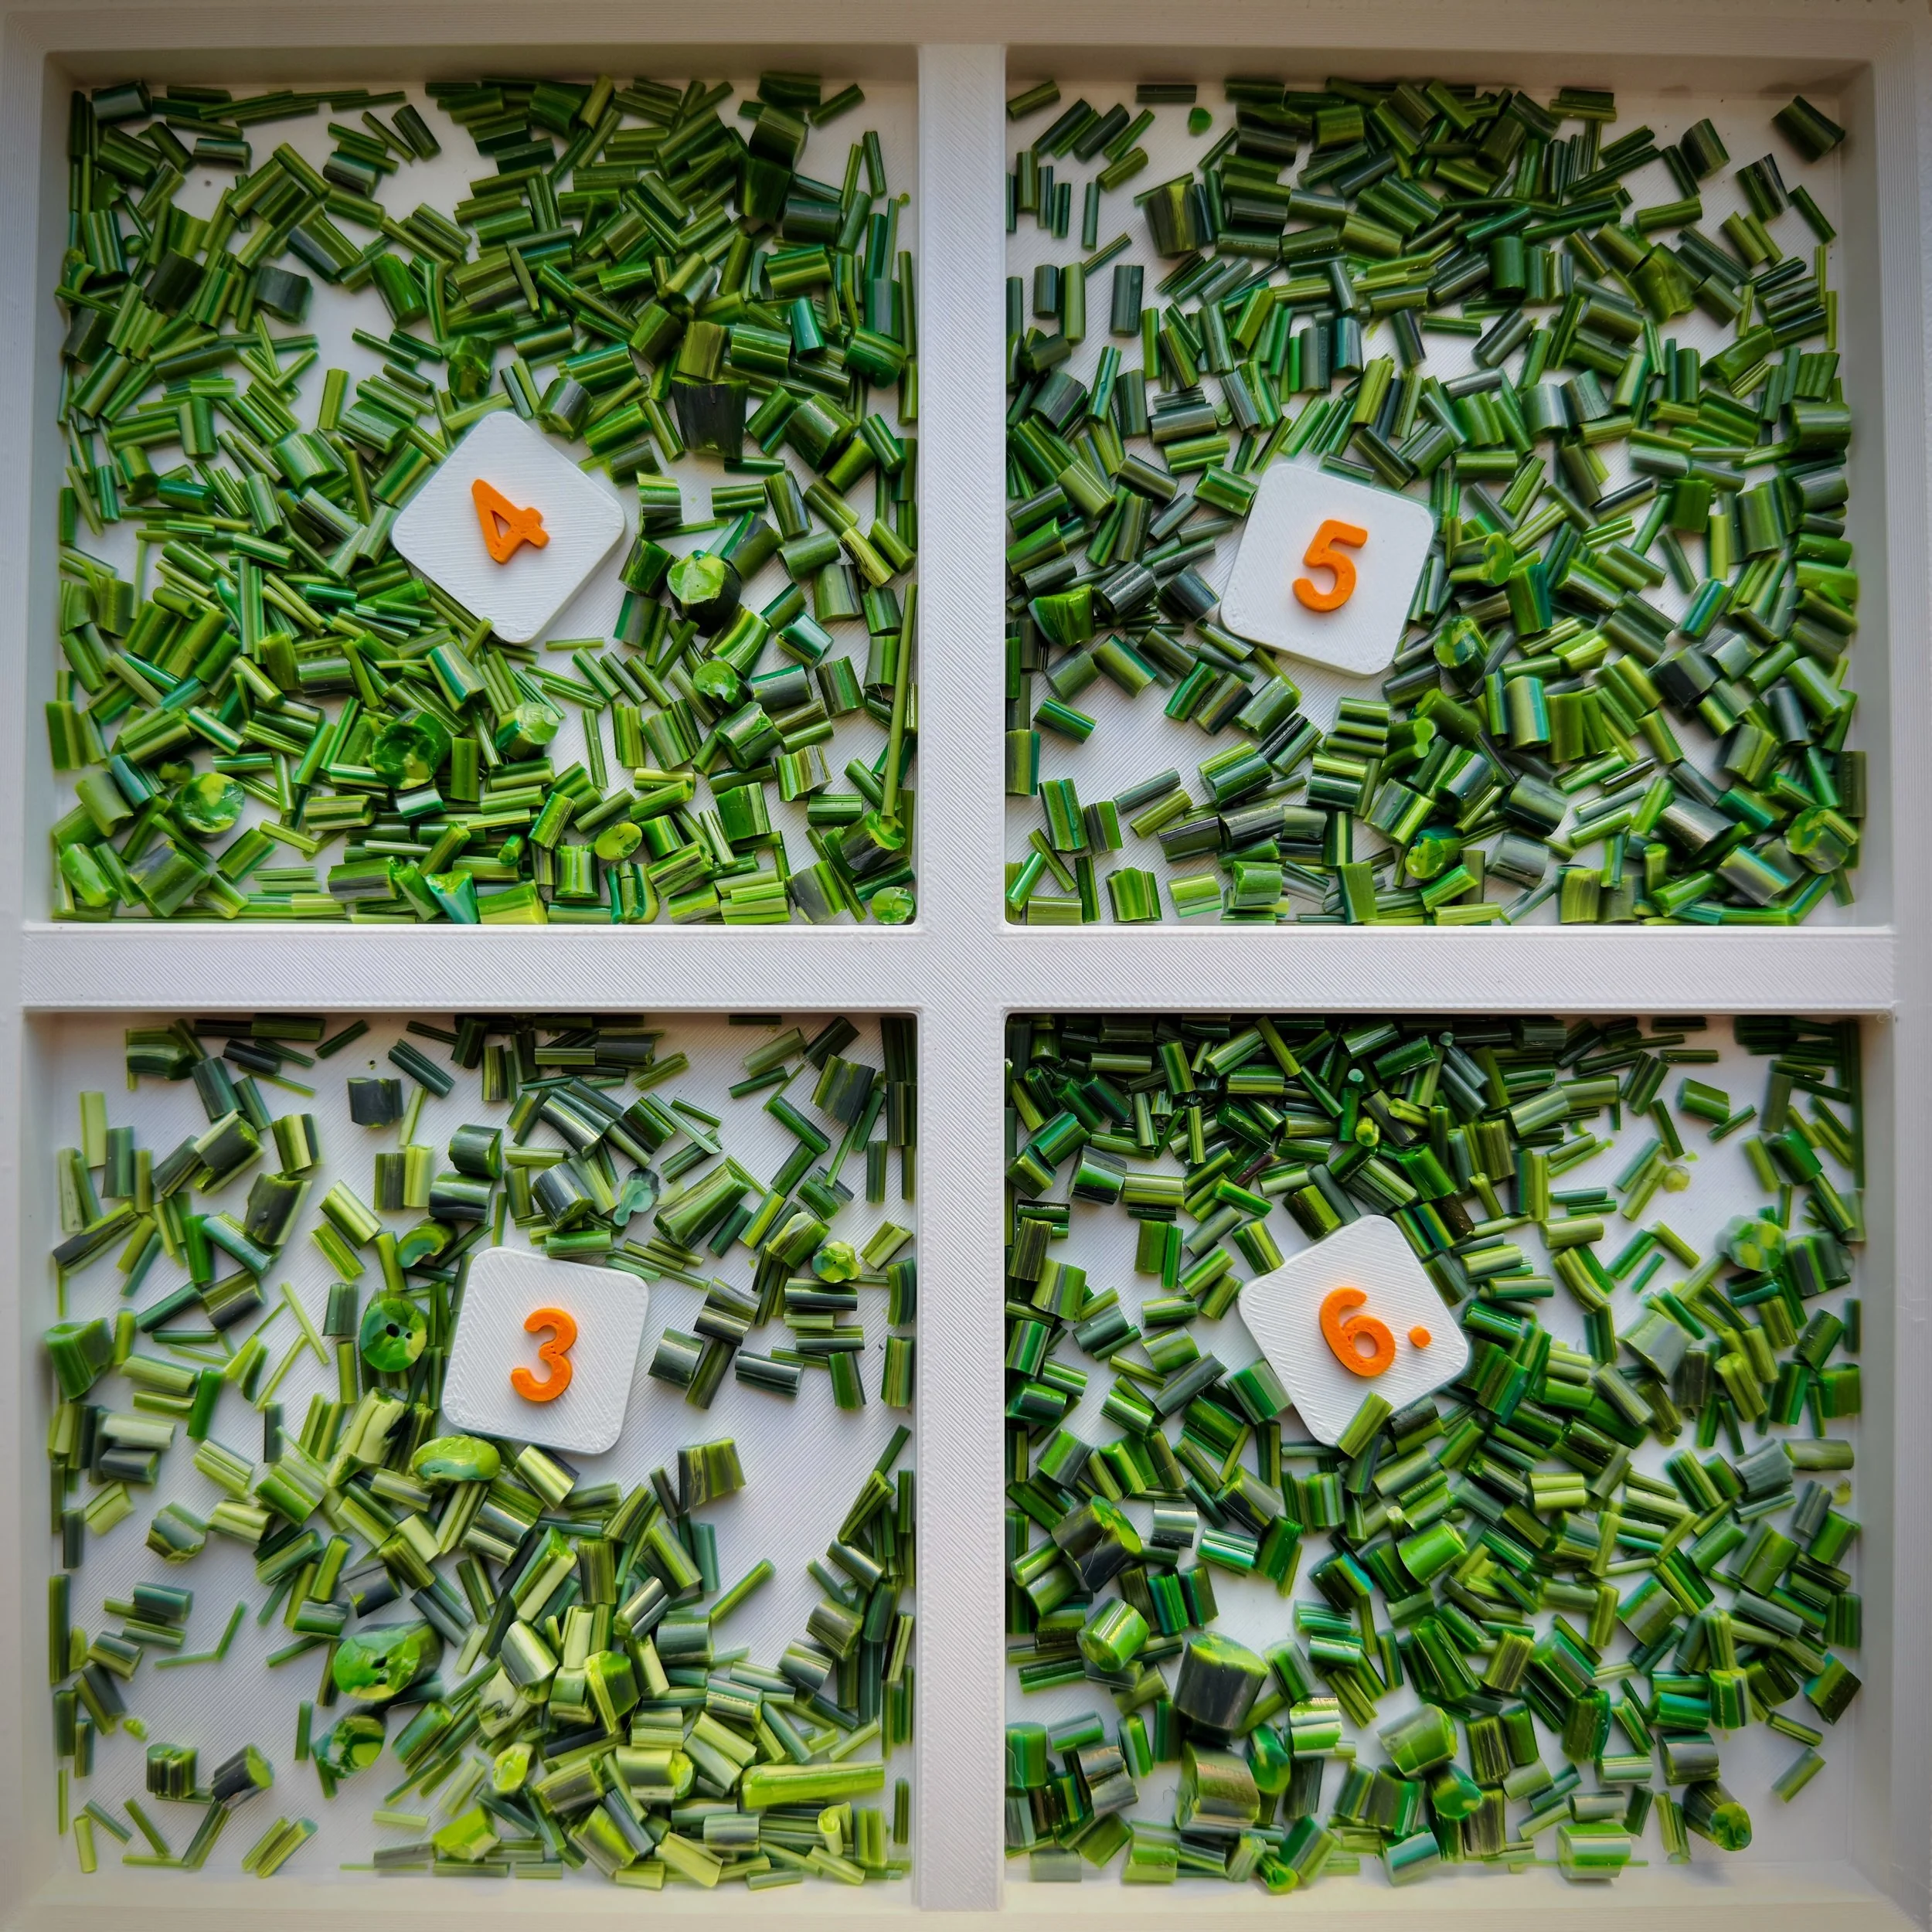
A sorting tray of batches 3-6.
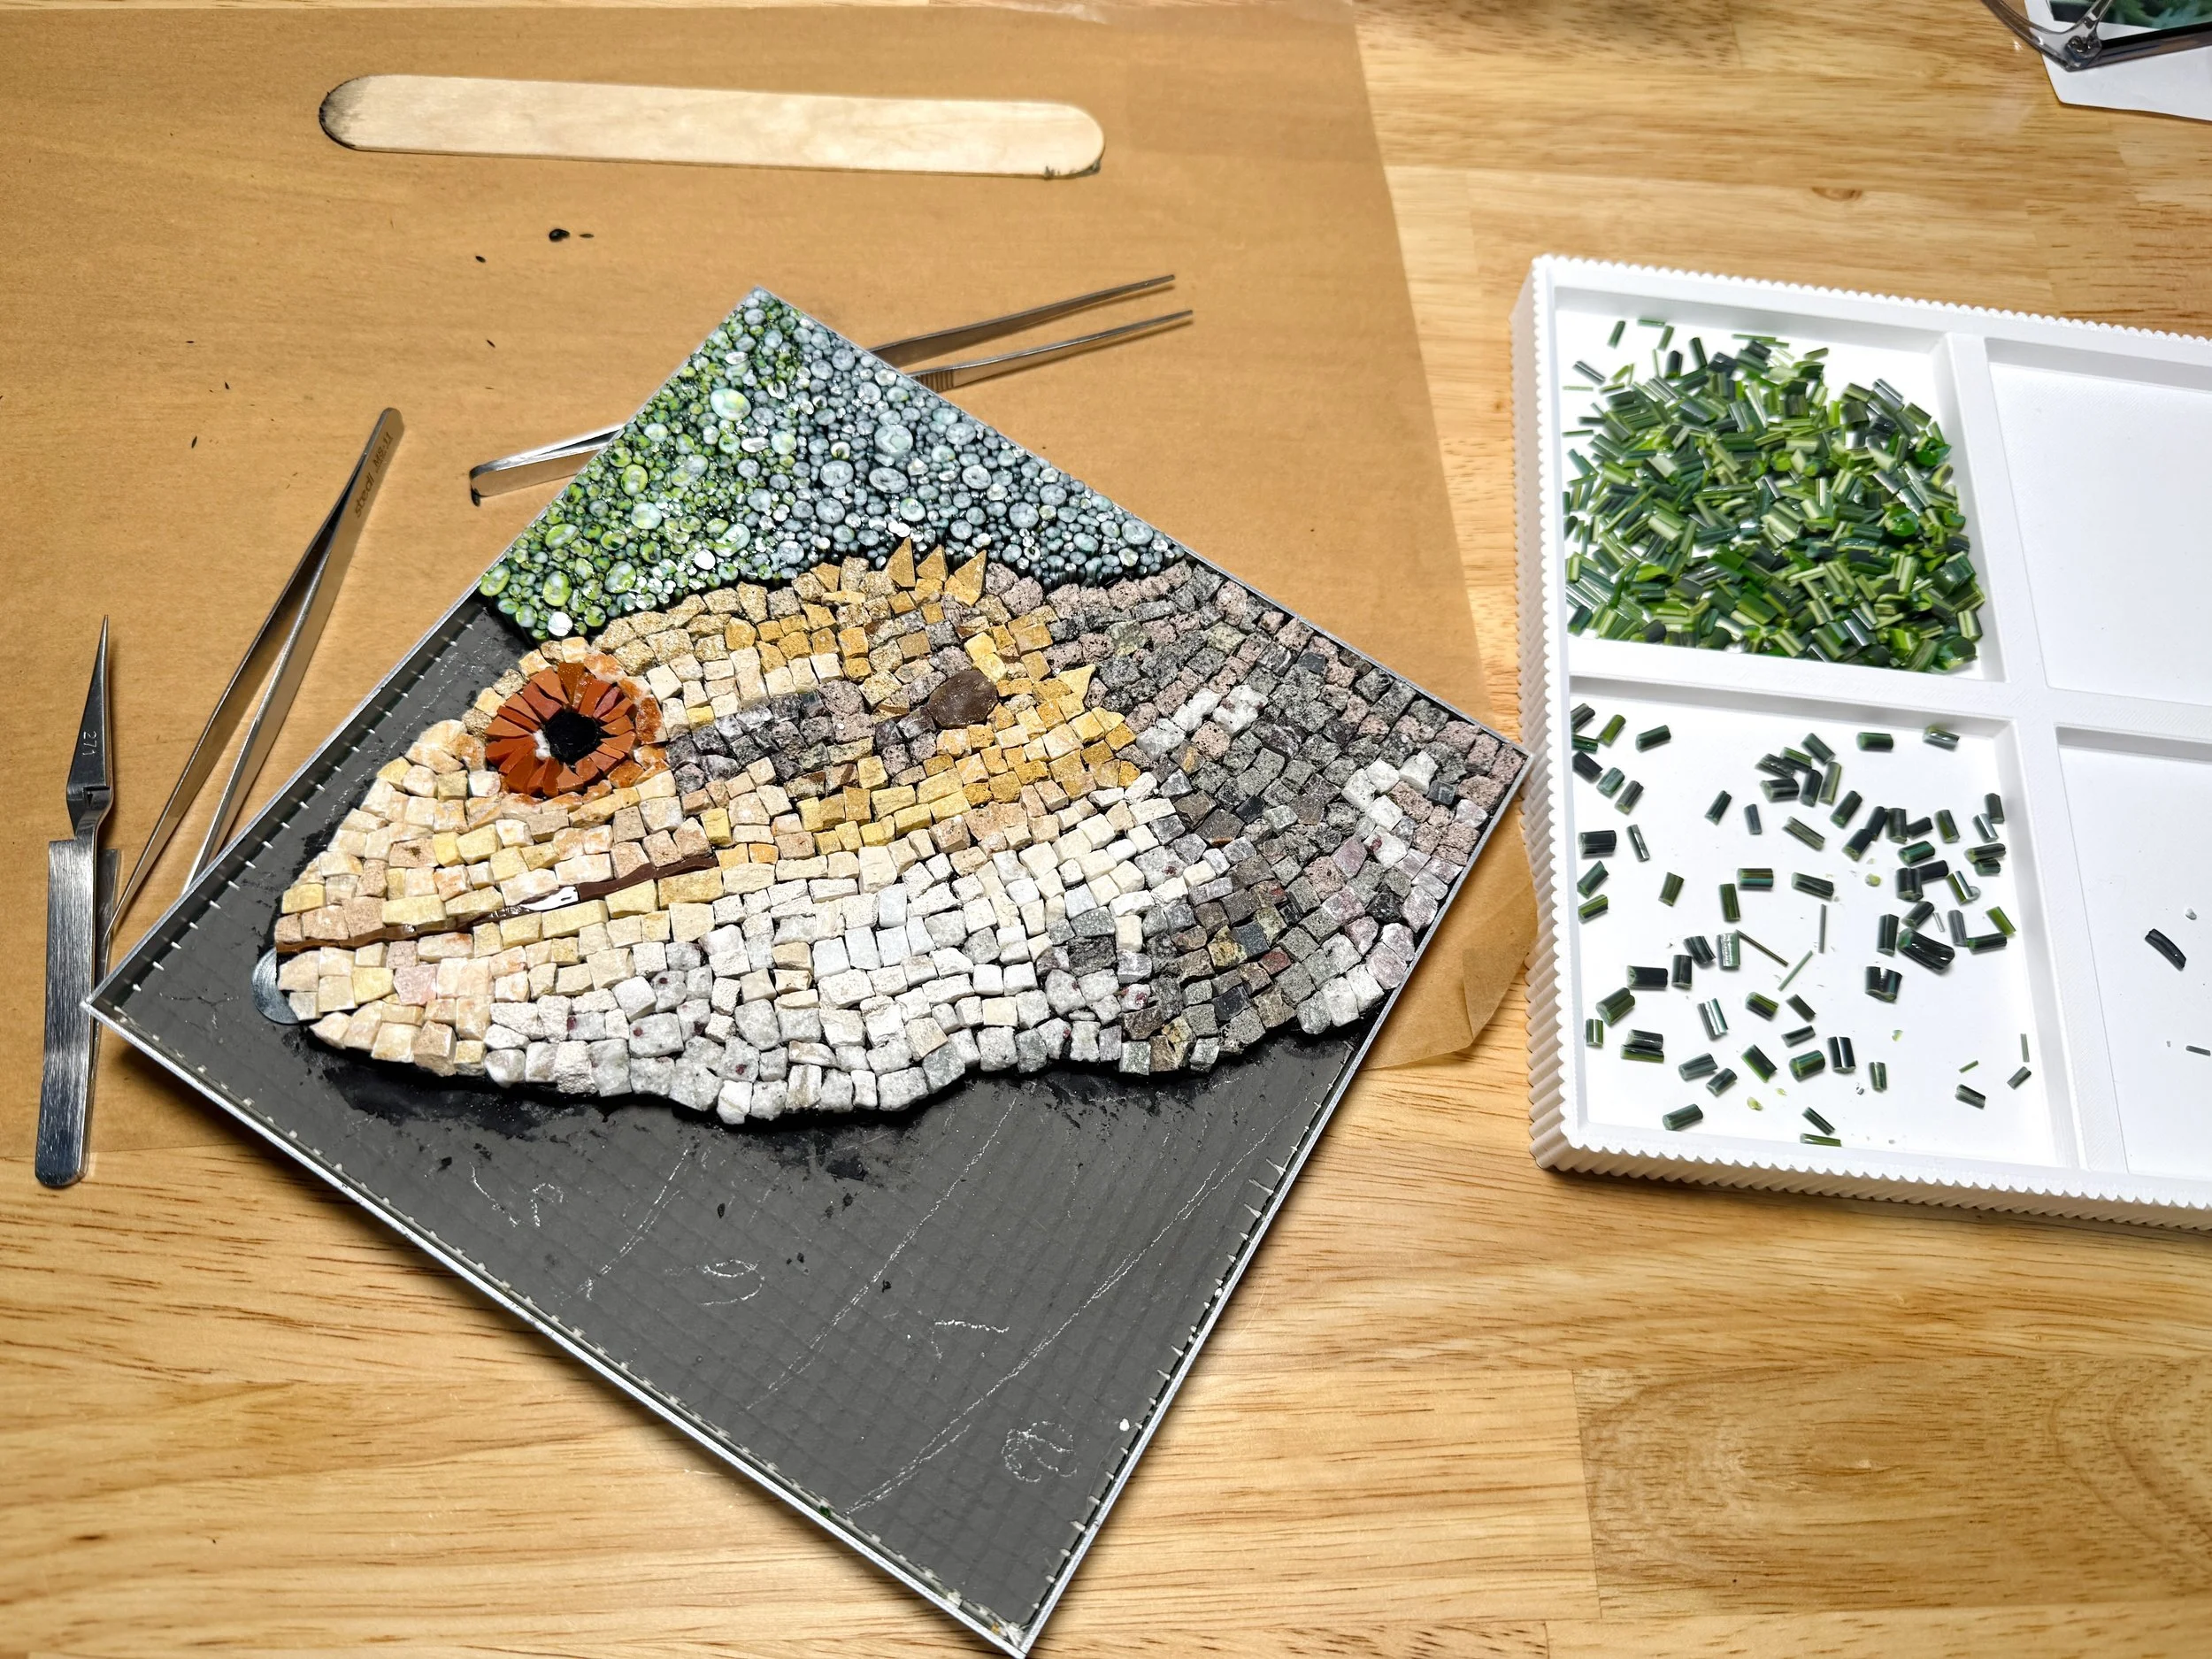
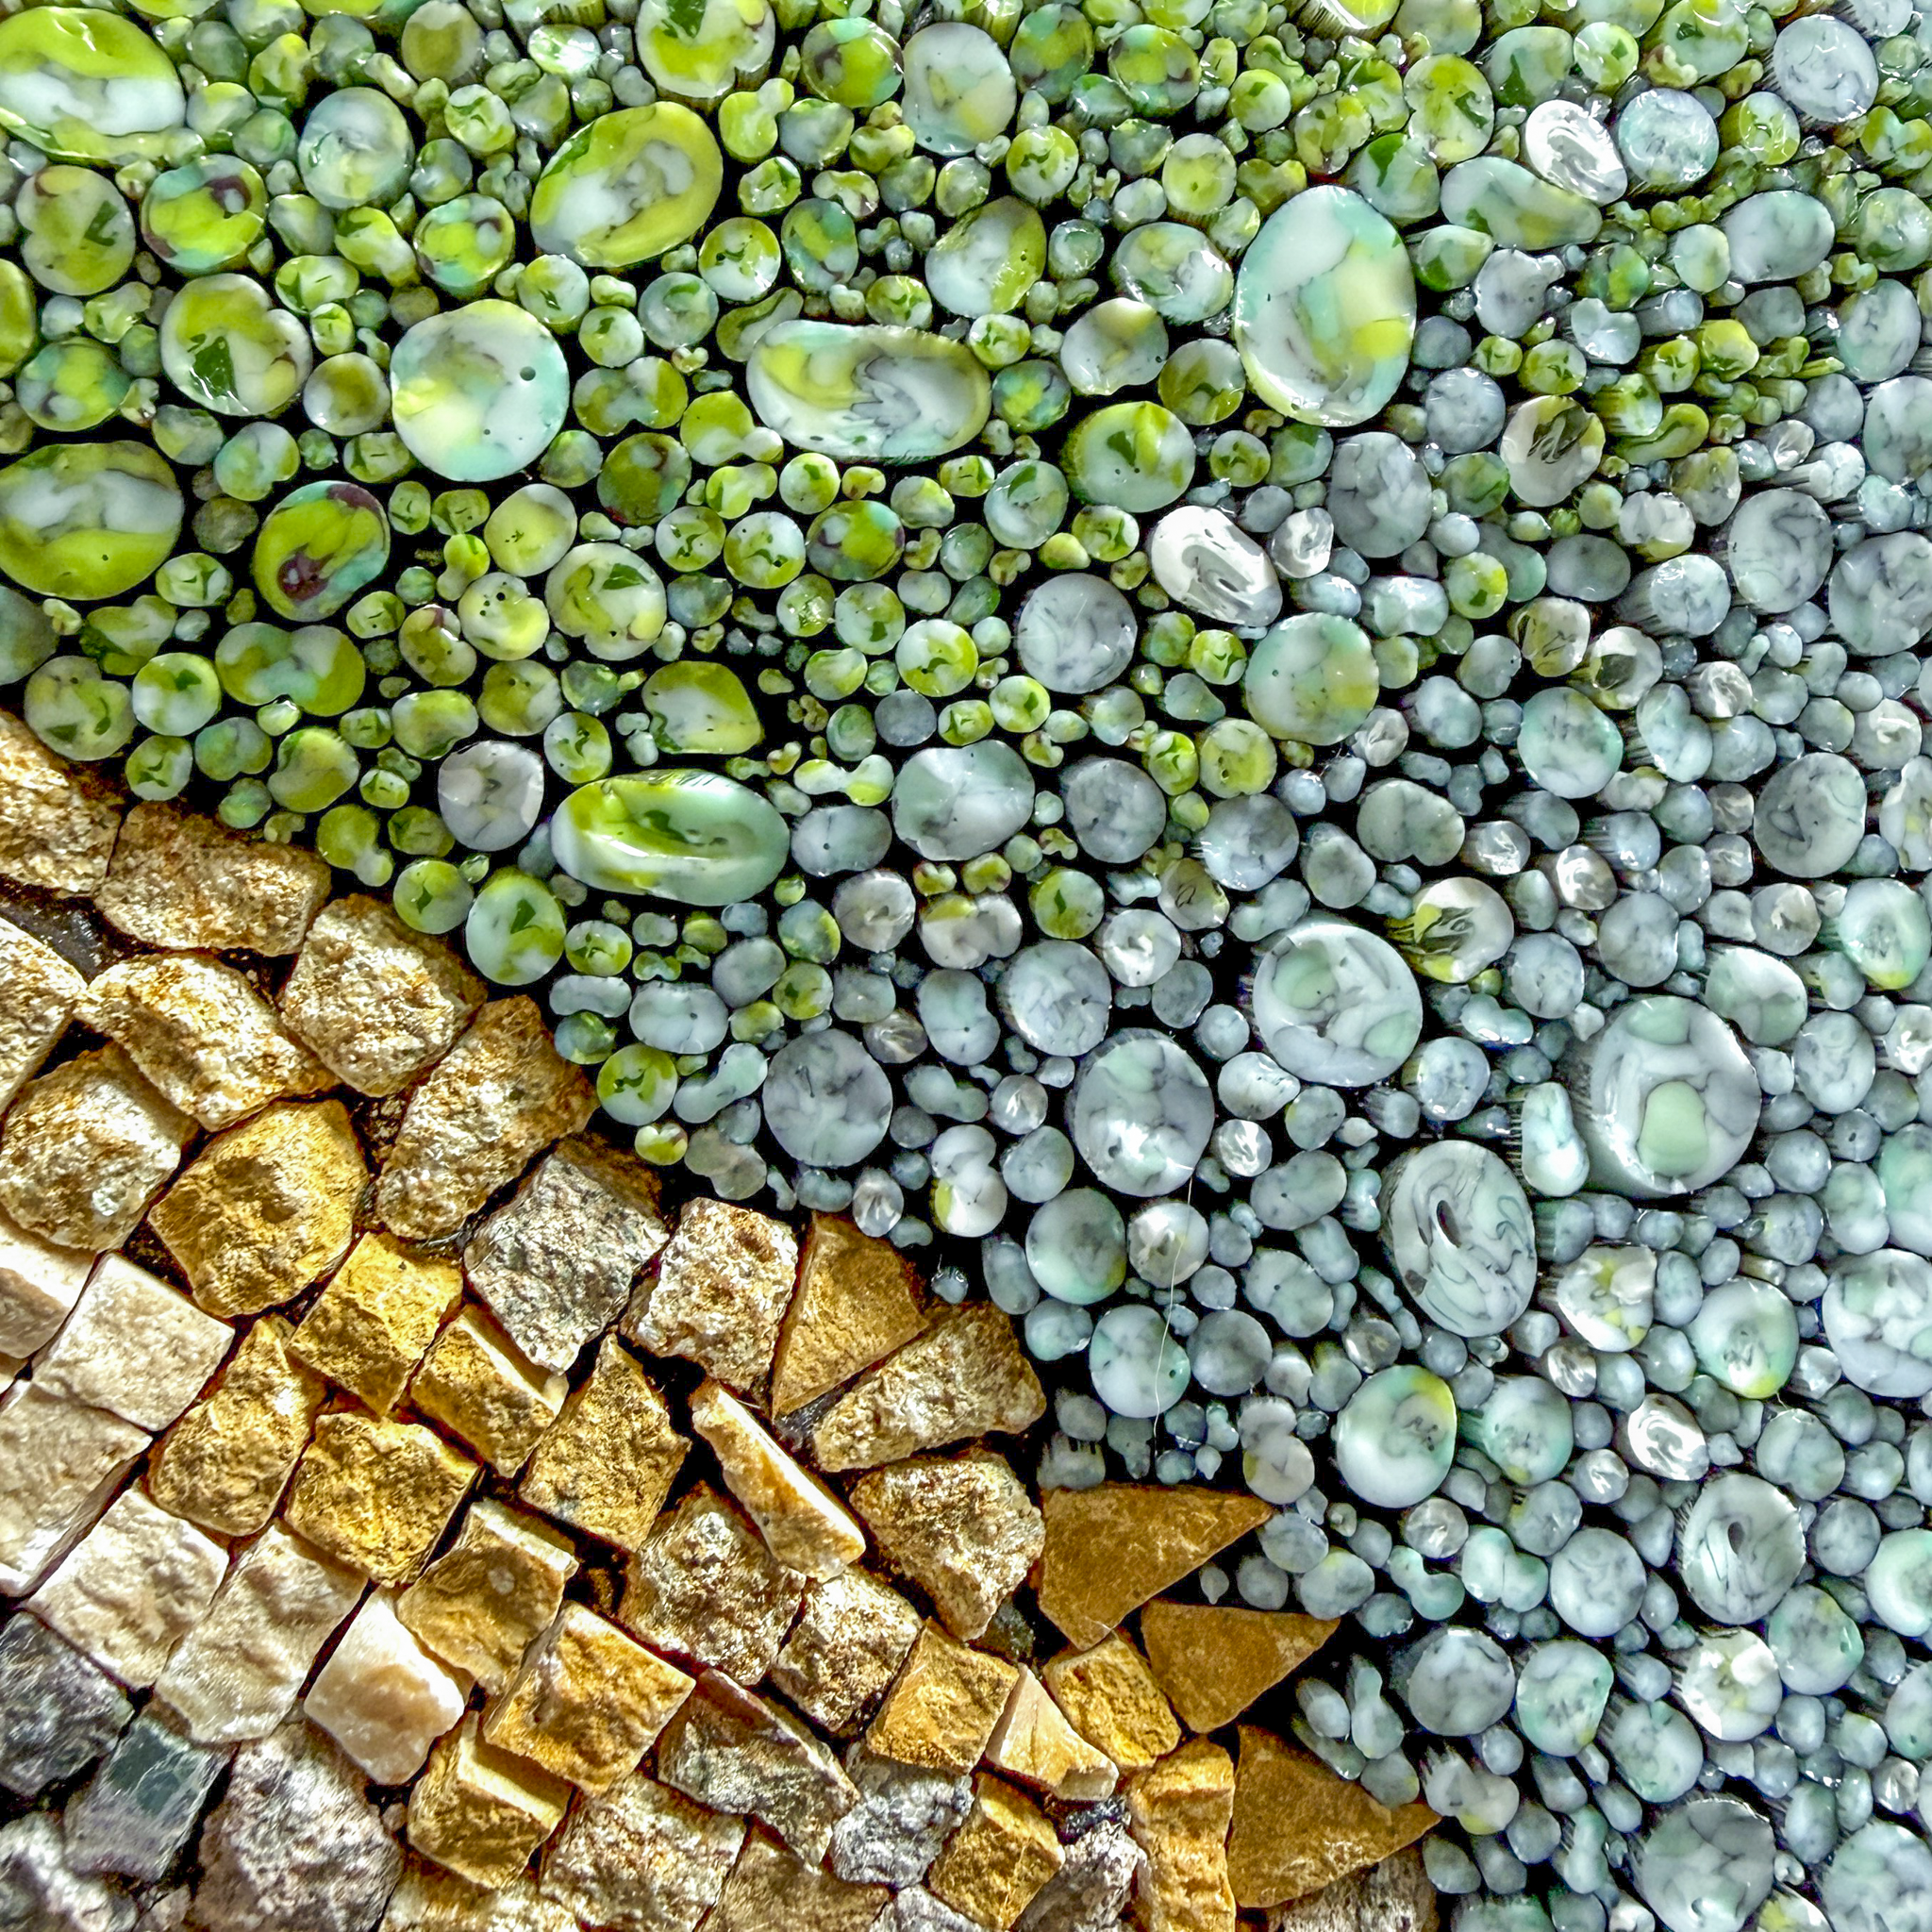
I meticulously placed the glass tesserae piece by piece. Here, batches 1-2 are filled in and you can see my pencil markings on the background for where I want each batch to transition.
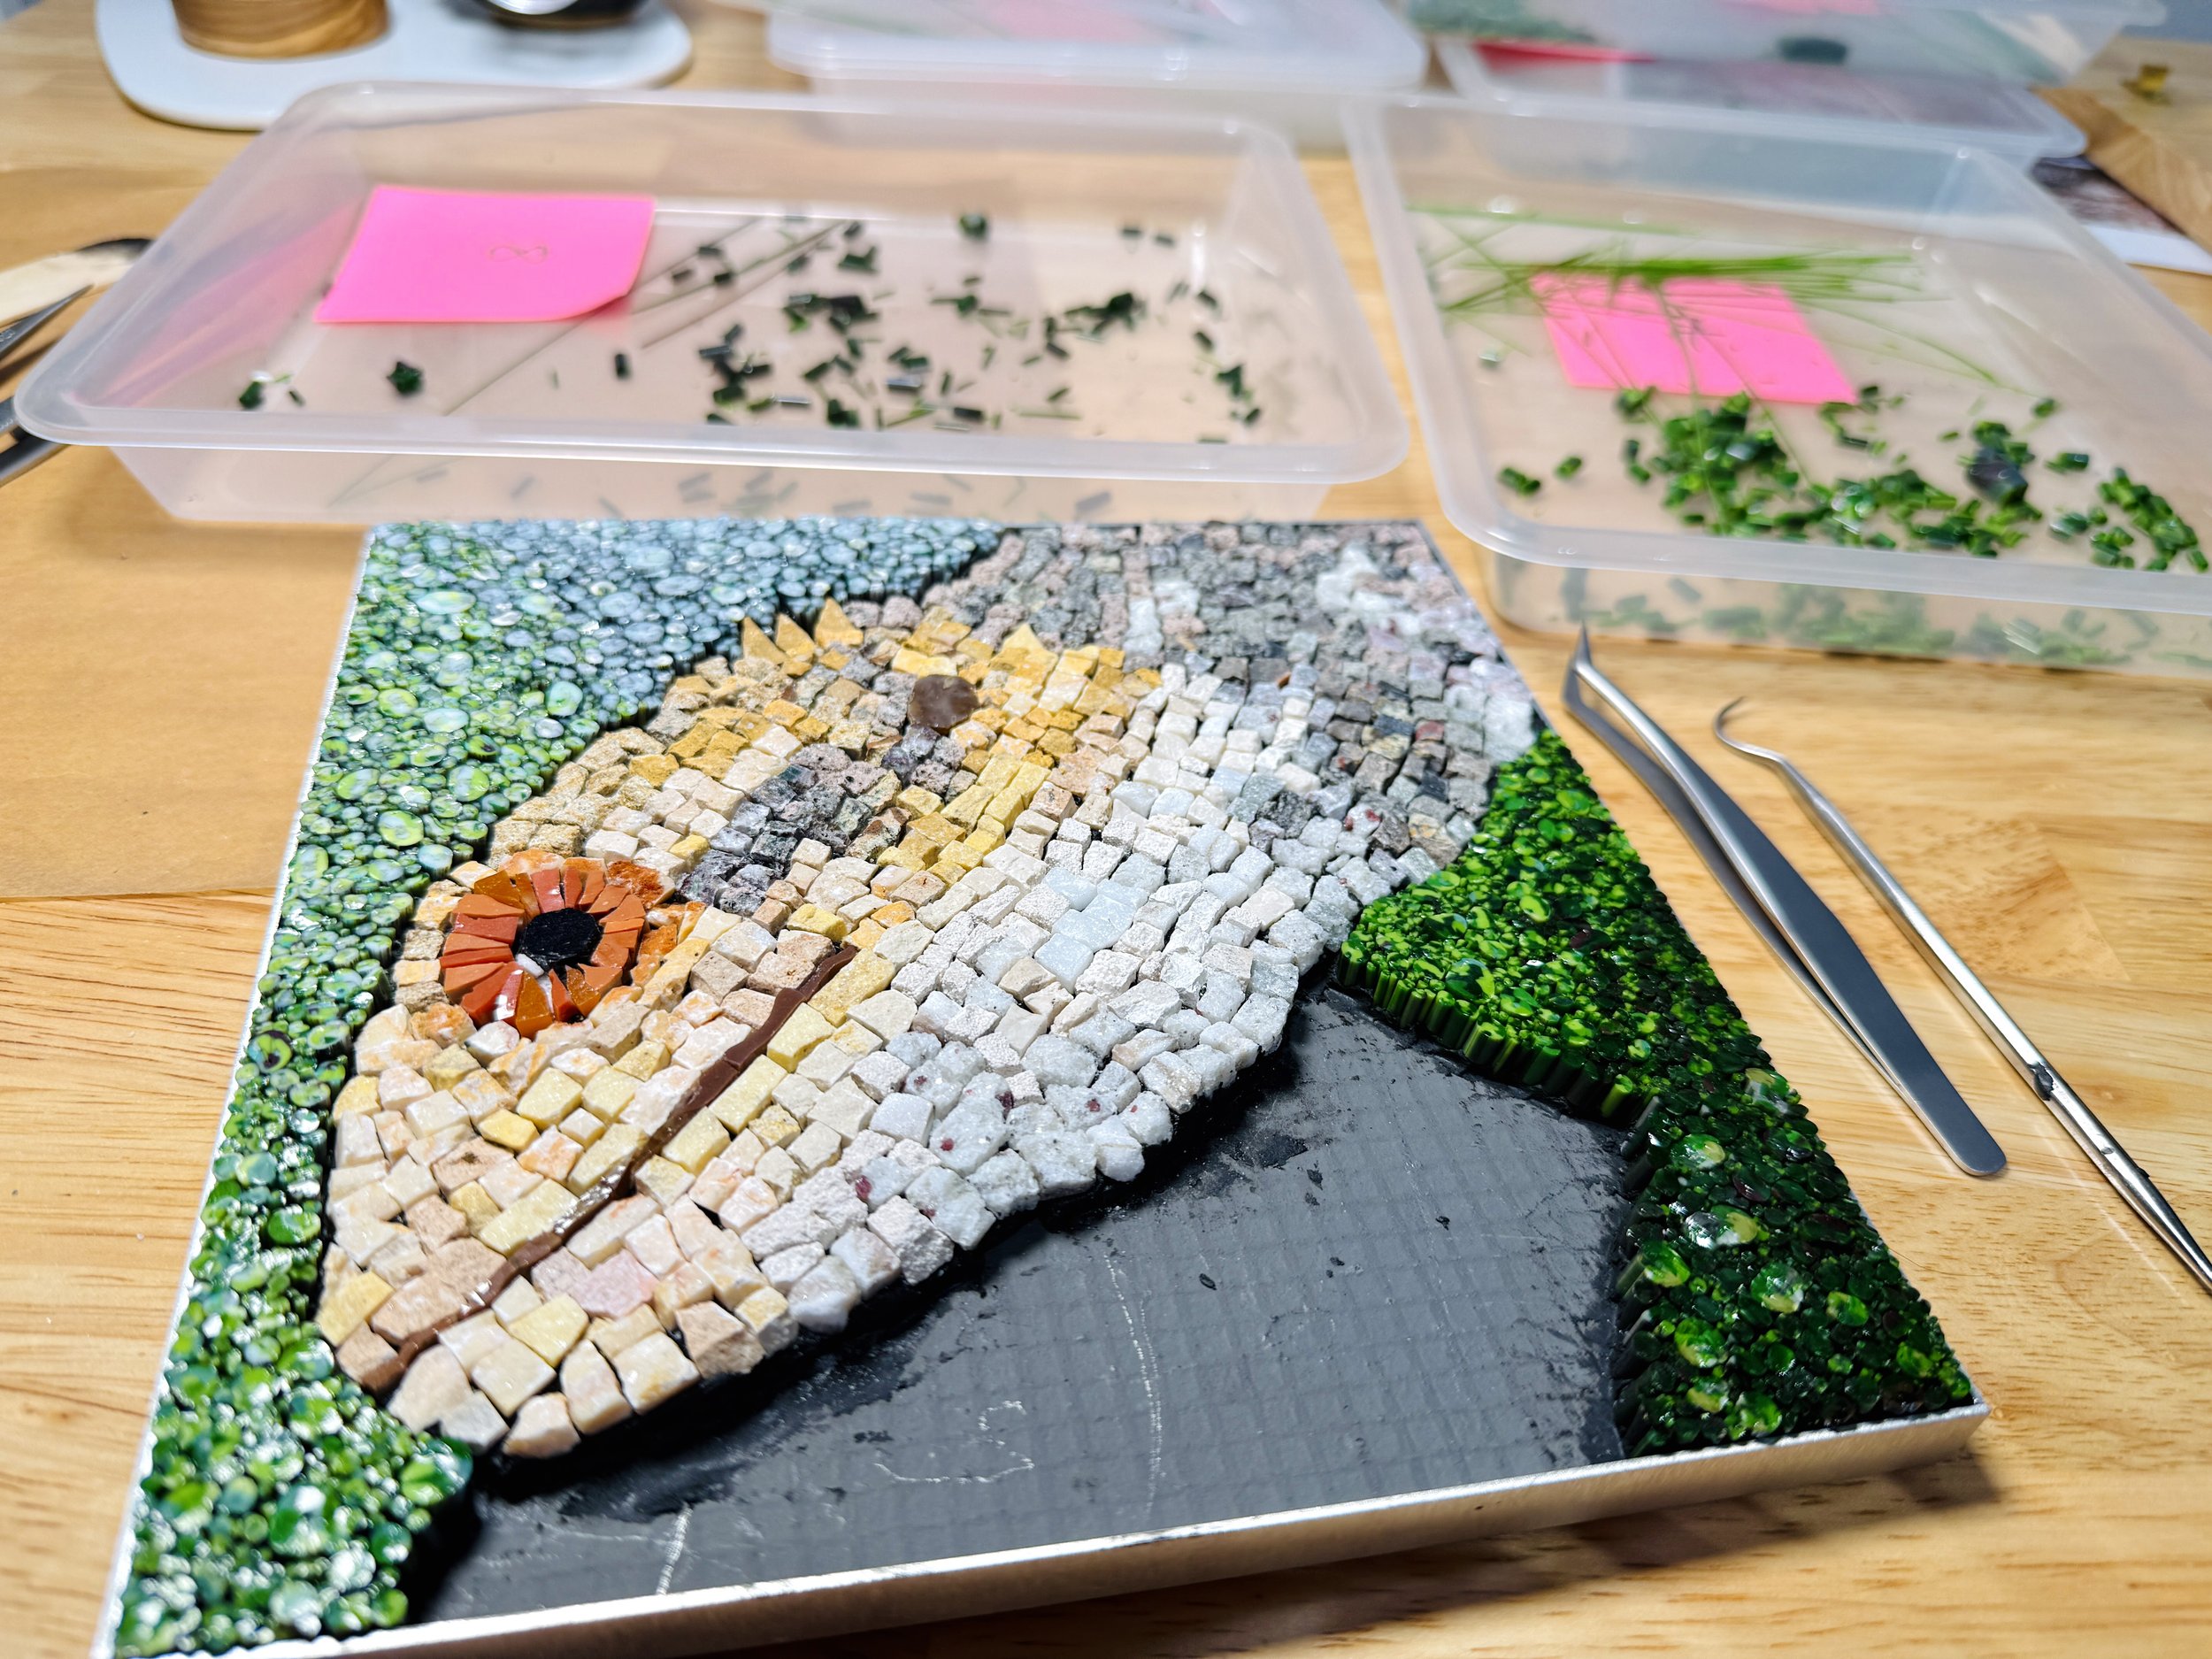
After placing the first third, I shifted to placing inward from batch 8, so I could be sure to meet transitions properly.
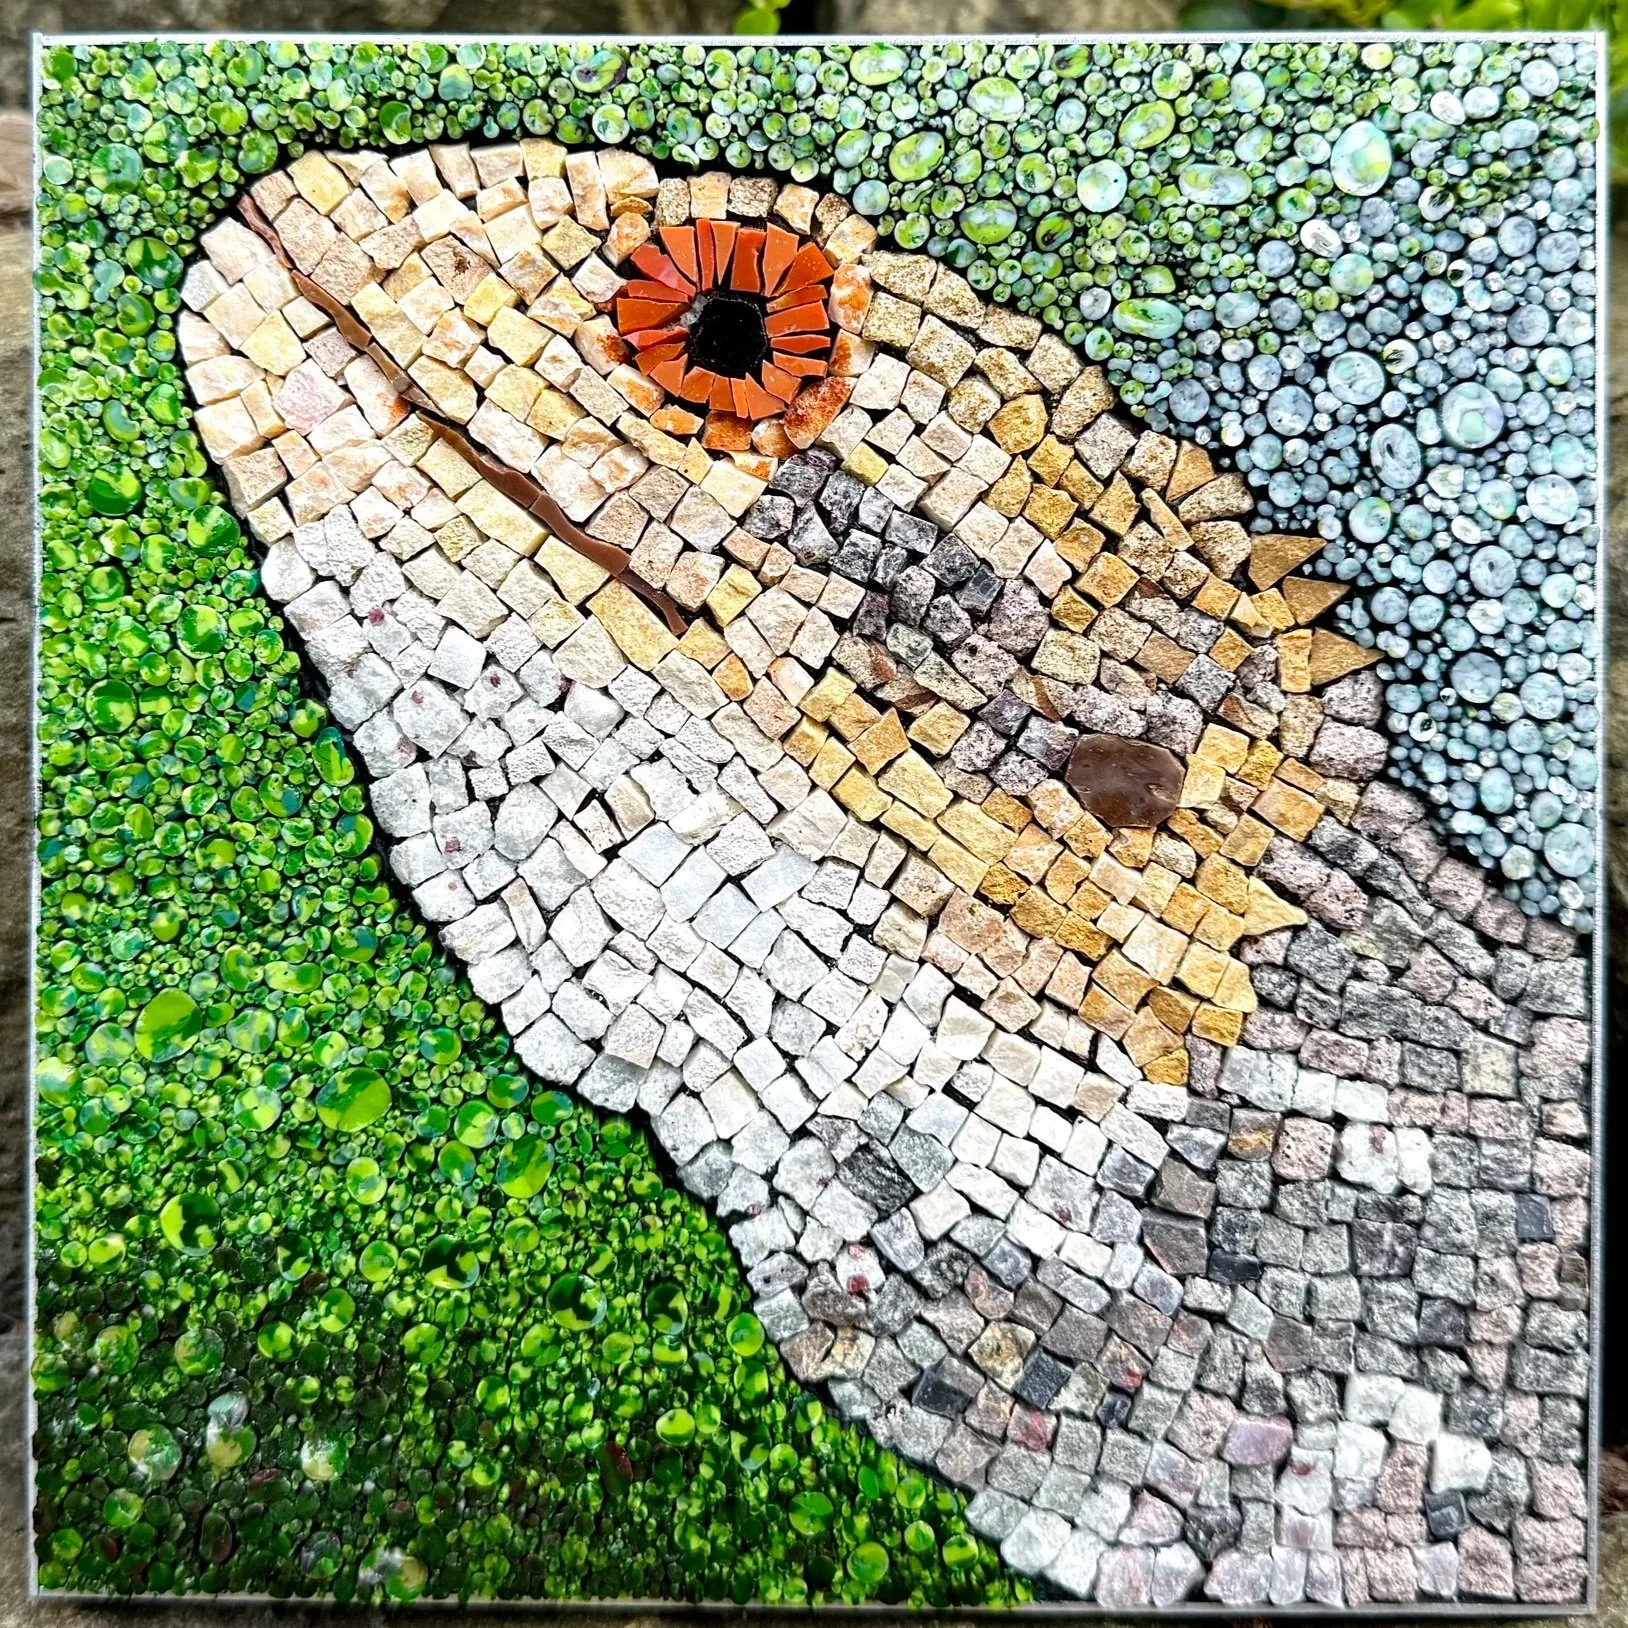
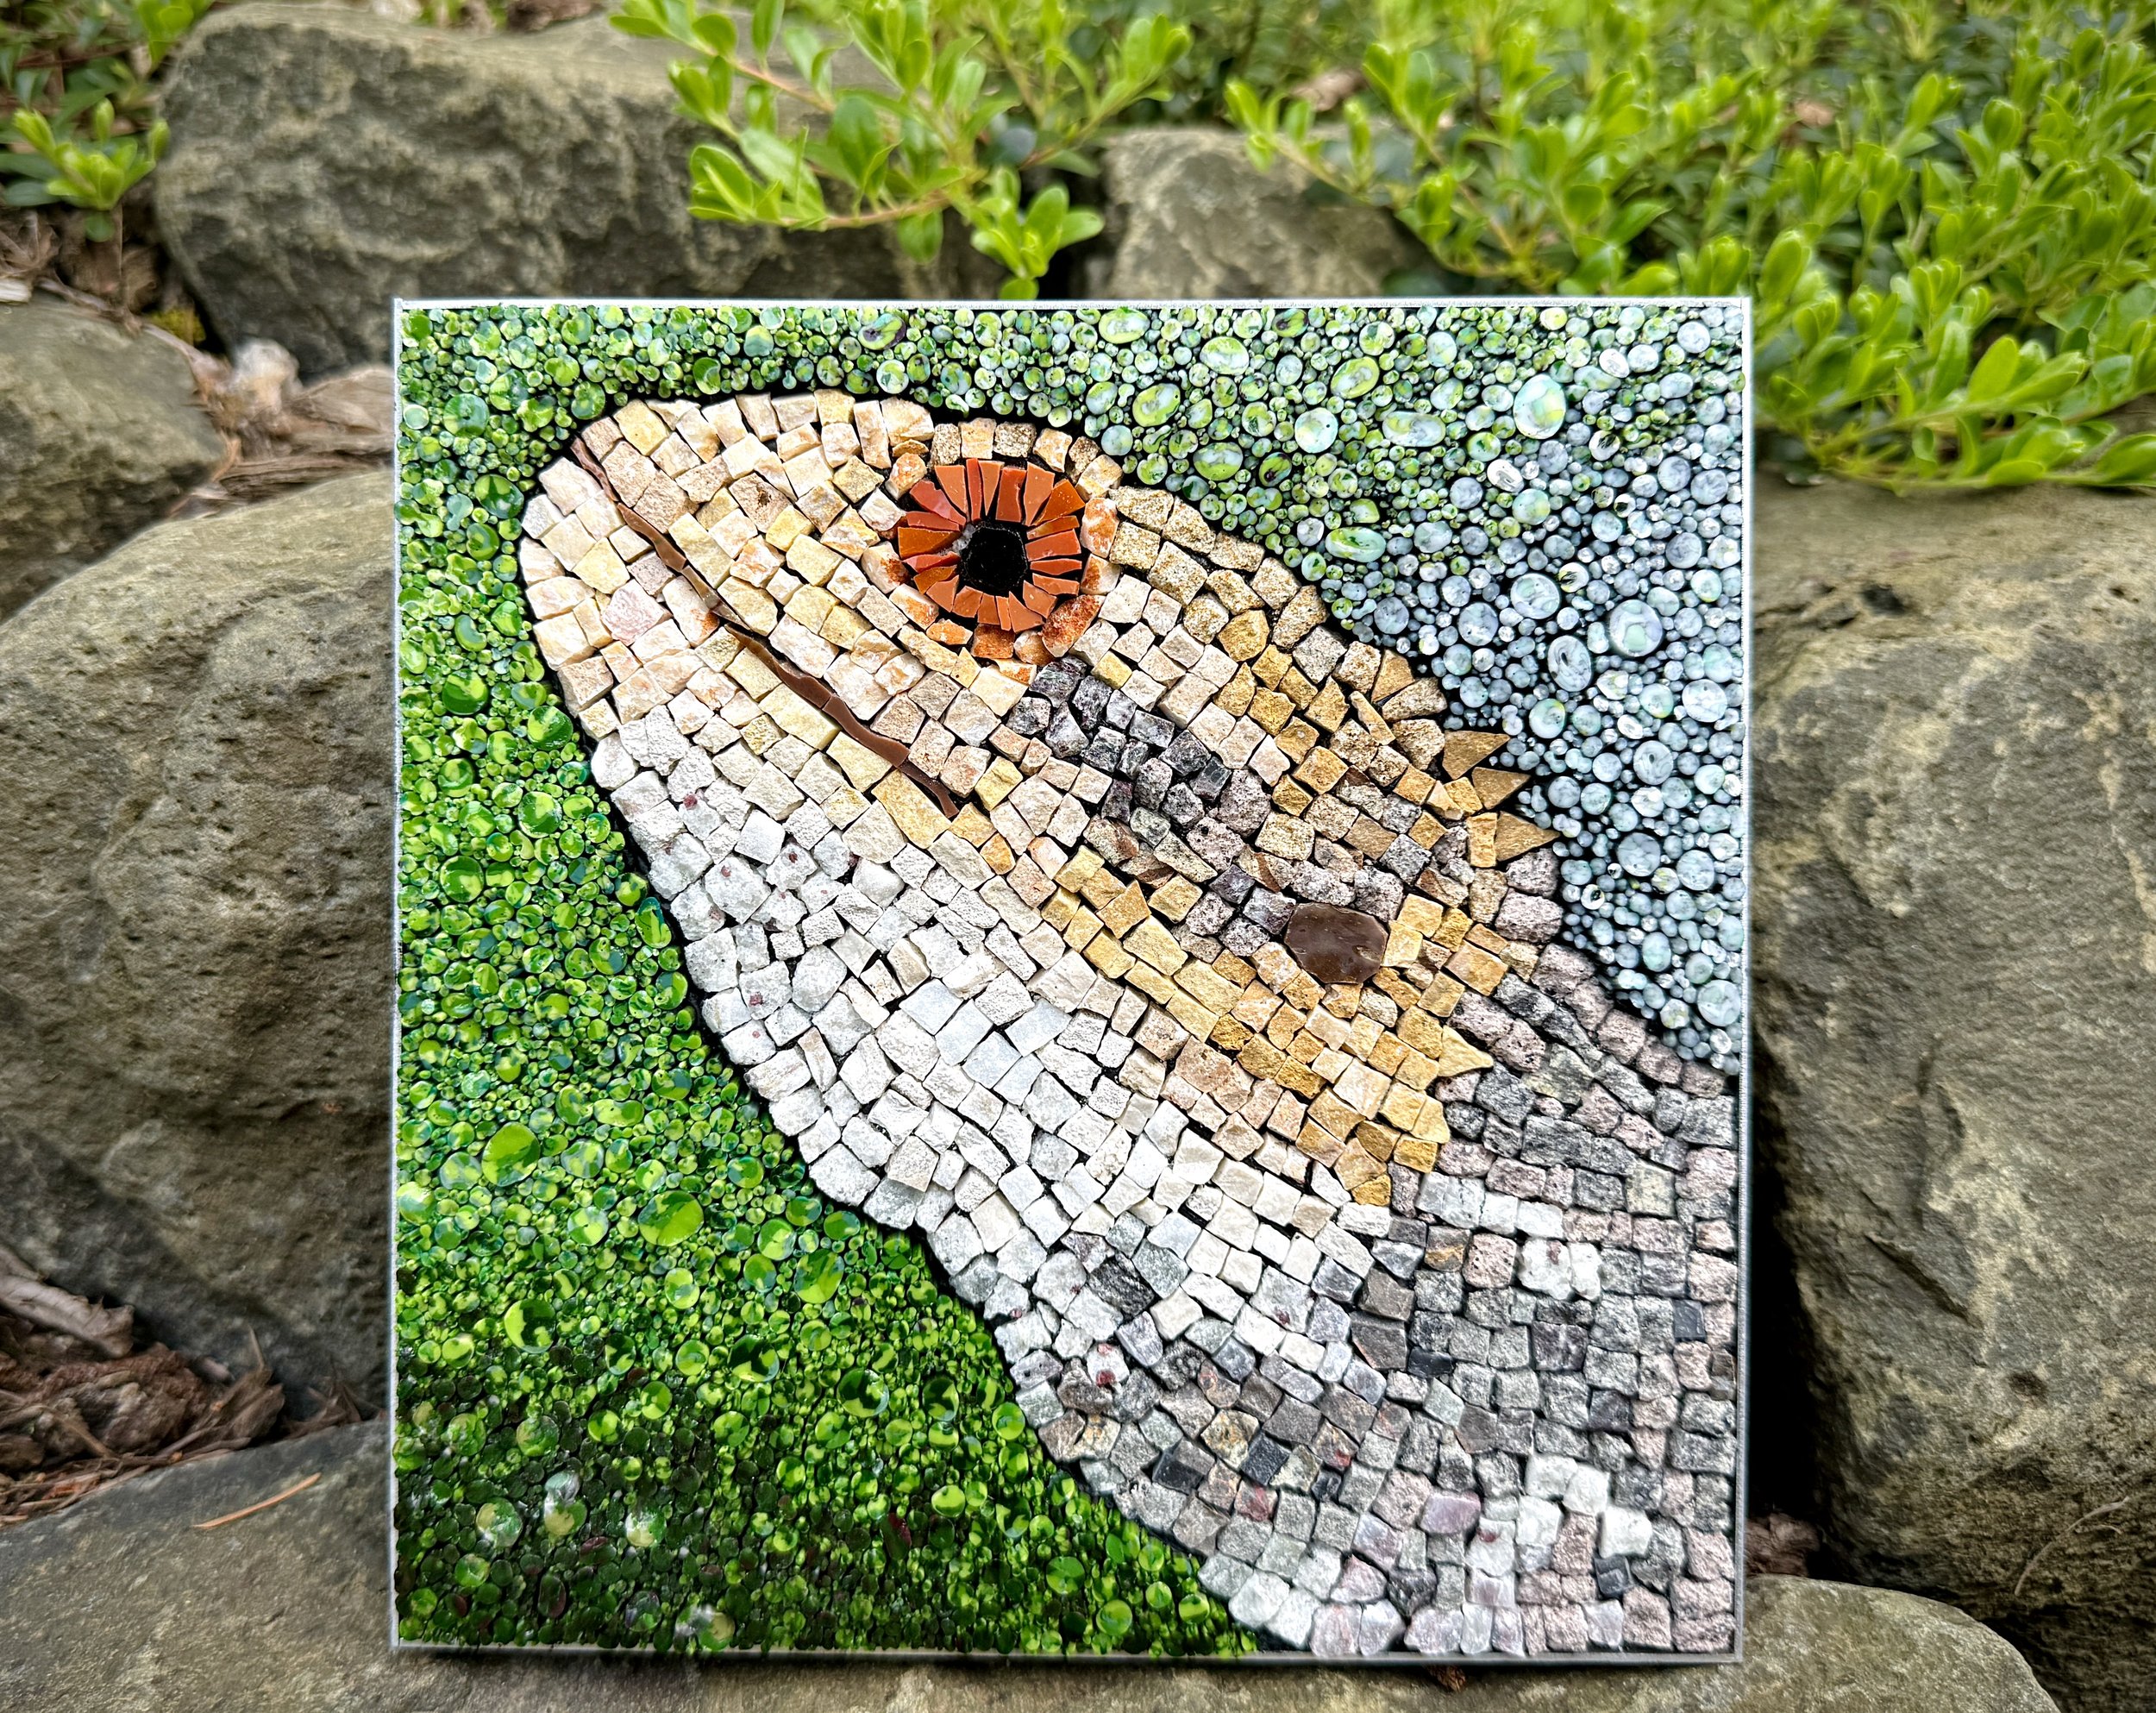
The finished piece of my clever lizard!